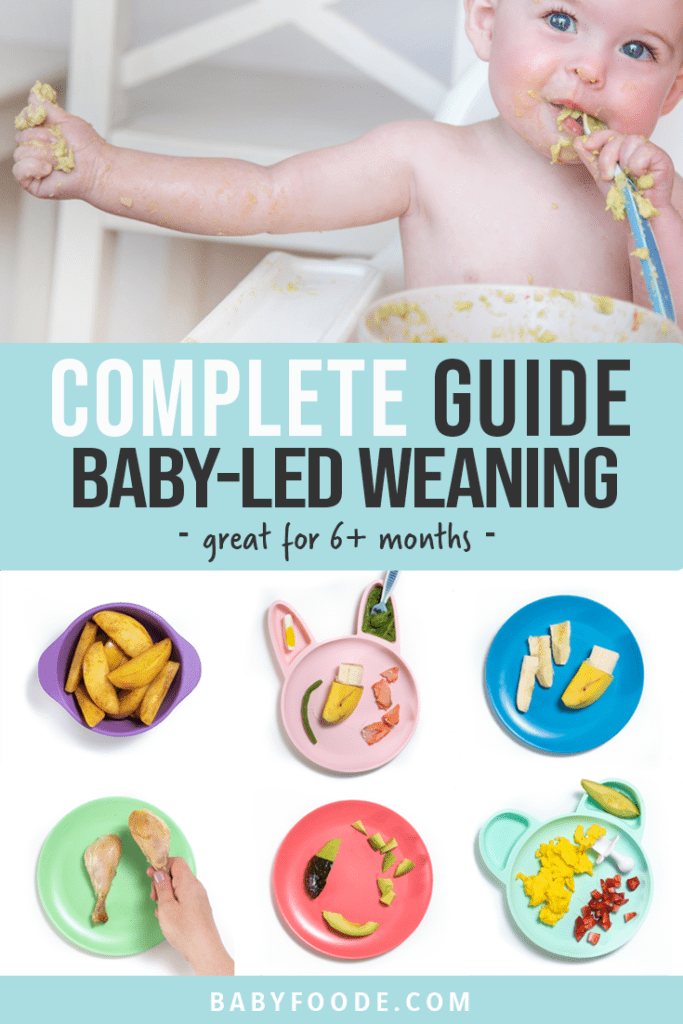
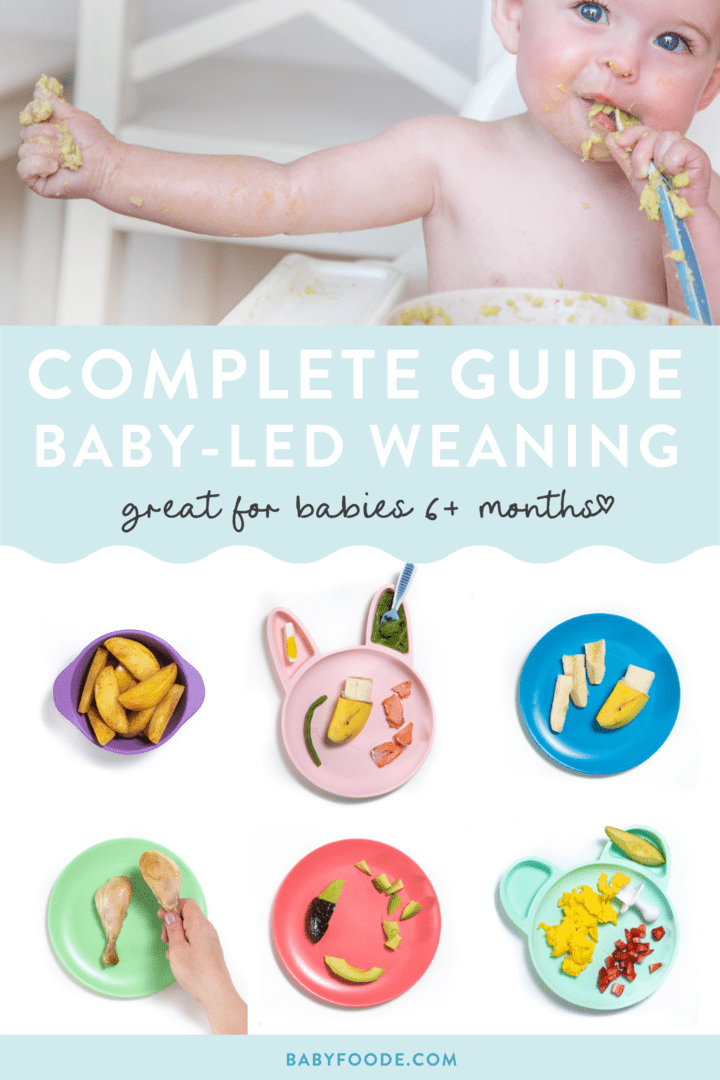
Complete Guide to Baby-Led Weaning
Medically reviewed and cowritten by Jamie Johnson, Registered Dietitian Nutritionist (RDN), and Lauren Braaten, Pediatric Occupational Therapist (OT).
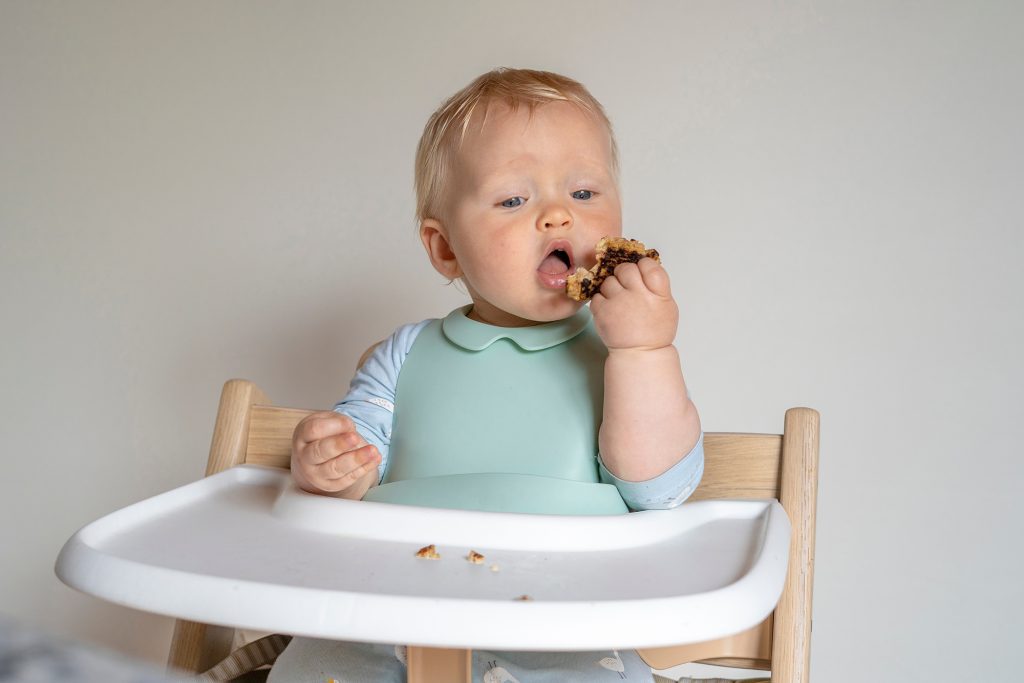
Here it is, the Complete Guide to Baby-Led Weaning! Everything you need to know to get started on baby-led weaning with your little one. What is baby-led weaning, choking vs gagging, top first foods, sample feeding schedule, helpful tools, how to teach baby to chew — name it, and you’ll find it here! This in-depth guide is perfect for babies ages 6+ months!
BLW Baby
Are you interested in doing baby-led weaning with your baby, but don’t know where to start? Do you love the idea of your baby eating the same foods as you but scared of them choking? Are you ready to start your baby’s weaning journey but not sure how to cut their food, or what to exactly to serve them?
Then you came to the right place!
In this guide, I’ll share everything you need to know to get started with baby-led weaning! Starting from what exactly is baby-led weaning, to every parent’s concern of baby-led weaning and choking, this guide goes over it all. I will also share how to know when baby is ready for BLW, the top 10 best first foods, a helpful sample blw feeding schedule, helpful tools to have on hand, and much much more! This guide is great for babies 6 months and up! You can also check out my best-selling cookbook for even more information and recipes!
Baby-Led Weaning Guide Video
Watch this video to learn more about baby-led weaning!
Reasons to Love Baby-Led Weaning
- great for babies 6+ months
- may promote good eating behaviors and curb picking eating (1)
- nutrient-dense
- easy to have one meal for the entire family
- could help prevent obesity later in life
- promotes fine motor skill development (1)
What is Baby-Led Weaning
It seems like you’ve seen information about baby-led weaning everywhere these days.
But what exactly does baby-lead weaning mean?
The term baby-led weaning was introduced by Gill Rapley, a public health nurse and midwife, in 2005. The official definition from her handouts is “a way of introducing solid foods that allows babies to feed themselves – there’s no need for spoon-feeding or purees.” You might also start to see the term “baby self-feeding” used interchangeably with baby-led weaning in many resources. With baby-led weaning, baby starts off eating many of the same foods that the rest of the family is eating.
On the other hand, traditional weaning, often called spoon-feeding, involves the parent bringing the spoon to your baby’s mouth. Foods typically started within this approach include smooth purees, such as fruits, vegetables, rice cereal, or oatmeal. Textures gradually progress to mashed or chopped foods and eventually soft finger foods, such as cooked vegetable pieces, toast, pasta, and meats.
The introduction of solid foods, whether starting with purees or soft solids, happens along with continuing to offer breast milk or formula, which should start roughly around 6 months or age.
So, what approach is best for you and your baby? And yes, we’re taking into account YOU, as the parent, because YOU are the one responsible for planning, preparing, serving, and cleaning up after meals – you matter too! There’s no one size fits all approach– you might decide to start with one way, switch to the other, or use a combination of both. For this post, we advocate combining both approaches (purees and baby-led) for a few different reasons, as mentioned in the bullet points below. But most importantly, ALWAYS follow your baby’s lead, no matter what approach you use. Below are some pros and cons to help you make an informed decision on how to start.
Benefits of Baby-Led Weaning
- Baby controls what goes in their mouth. By allowing our babies to self-feed, they get to decide whether or not to eat, as well as how much to eat. This may lead to toddlers who are better able to regulate their appetite. One study found that families who followed a baby-led weaning approach were significantly more likely to be rated at 18–24 months as less food responsive and more satiety responsive. (3)
- Baby eats what the family is eating. No short order cooking necessary, only slight modifications, depending on the specific meal. The process of getting a meal on the table for the whole family might feel easier and less time-consuming.
- Baby sits and eats with the family. There are numerous benefits to having regular family meals, such as more nutrient-dense food intake, more food enjoyment, and less fussy and emotional eating. Getting your baby in the habit of participating in family meals helps set the expectation for years to come. (4)
- Baby is exposed to a variety of tastes and textures from an early age. Research shows that infants introduced to solids between 6-9 months ate more fruits and vegetables than infants introduced to solids after 9 months of age. (5)
- Baby gets the full sensory experience of eating. Babies learn about the world through their senses, and eating is no exception. Allowing your baby to grasp, hold, squish, pinch, and mash, starting from their hands all the way to their mouth, gives them feedback about different kinds of foods.
- Baby gets extra practice at developing fine motor skills and hand-eye coordination. All that practice with grasping and pinching foods and bringing them to their mouth is another great way to work on these developmental motor skills.
- It may be less stressful for parents. One study found that mothers who followed a baby-led approach had lower responses regarding maternal pressure to eat, restriction, concern for child weight, and monitoring. (6)
Challenges of Baby-Led Weaning
- Missing out on pureed foods. If you are following a “strict” baby-led approach, your baby will miss out on purees. Arguably, even as adults, we DO eat purees often (yogurt, mashed potatoes, ice cream, smoothies, soups, etc). Exposing your baby to all types of textures, including purees, provides a full sensory experience.
- Careful with salt, sugar, and (not so good) fat. If you are serving family meals with little or no modification, your baby may be exposed to higher levels of sodium, saturated fat, and sugar than necessary.
- Keep an eye on excessive gagging. Although gagging is typical for babies just learning how to eat (and different from choking, which we discuss below), some may gag more often and have difficulty with first foods more than others. This may lead to your baby having a negative experience with early self-feeding and can also aggravate babies with gastroesophageal reflux.
- Hard to know how much your baby has actually eaten. Granted, in the first year of life, solids are mostly complimentary and your baby is still getting the most nutrition from formula or breast milk; however, this may be something to consider if your baby is on the lower end of the growth chart and pediatrician and/or parents are tracking food and bottle intake.
- May feel more stressful for other parents. As noted above, some parents who use baby-led weaning report lower stress, but it’s worth noting that it may feel more stressful for others to start with this approach. Keep in mind that what you bring to the table can affect how your baby eats. If you feel rushed or stressed, your baby will pick up on this too. And when we feel stressed, appetite often decreases.
Benefits of Traditional Weaning/Spoon Feeding
- Baby learns how to swallow safely first, then works on chewing skills later. Purees can be very helpful for teaching swallowing, as they help intrinsic tongue muscles develop, preparing your baby to chew and swallow more efficiently. It’s also less common to gag or choke on purees, which may help some babies feel more comfortable when starting the feeding process.
- You know how much your baby has eaten. Whether using store-bought or homemade purees, you’ll be able to get a good estimate on how much your baby consumed.
- Baby can get a lot of flavor from the start. Who says purees have to be boring and bland? Especially if you make homemade purees, there are some pretty tasty flavor combinations that you can offer baby as some of their first foods.
- Less Mess (well, maybe). Although letting baby touch and explore foods is an important part of the process, if you’re feeling hesitant on just how messy things are going to get initially, starting with spoon-feeding purees might help you ease into the process.
Challenges of Traditional Weaning/Spoon Feeding
- Preparing lots of different purees can be time consuming. In addition to making other meals for yourself and the rest of the family, it might feel challenging to make separate meals just for your baby. Although with homemade purees, you will often make a big enough batch so that you’ll have several weeks’ worth of food.
- Spoon feeding baby can make it tough to feed yourself during a family style meal. Sitting and eating when baby eats is possible, but you will likely have many interruptions as you pause to spoon-feed baby throughout the meal.
- Baby won’t get as much opportunity to engage in sensory exploration. Unless you progress to giving baby their own bowl or spreading purees on the tray and encouraging baby to taste the food off their fingers, they won’t get as much opportunity to feel the puree on their hands, fingers, and face.
- Feeding baby past signs of fullness. Reading baby’s cues is important no matter what approach you’re using, but there can be a tendency to continue to feed baby past signs of fullness when spoon-feeding and sneak in “just one more bite” from that almost empty container.
- Getting “stuck” in a comfortable zone. Once baby seems to have mastered taking purees from a spoon, it can get tempting to stick with what you know. But baby can get too comfortable with the smooth texture of purees if not encouraged to progress to other textures. This may lead to difficulties managing these textures later on in life.

When is Baby Ready for BLW?
Whether you decide to use a baby-led weaning approach, spoon-feeding (often known as traditional weaning), or a combination of both, look for these readiness signs in your baby:
- Around 6 months of age
- Sitting with minimal assistance
- Good control of their head and trunk
- Bringing hands and toys to their mouth
- Appears interested in food, possibly by reaching for or leaning forward towards food
Before you start weaning your baby, you should consult with your pediatrician to make sure your child is developmentally ready.
When are You Ready for BLW?
Just as it is important to know when your baby is ready, it is also important for you to be prepared to teach your baby how to wean. Here are some things that are important to know before you get started.
- Know infant CPR. No matter what approach you take to feed your baby, it’s essential to educate yourself on what to do if your baby chokes on something. Babies are constantly exploring and often attempting to put things in their mouths – both edible and non-edible, so it’s essential to be prepared. You can attend a live class in your area or take this online course.
- Understand choking vs. gagging. (see below)
- Educate yourself on high-risk choking foods. (see below) One study found that infants following a baby-led approach that includes advice on minimizing choking risk do not appear more likely to choke than infants following traditional feeding practices. (7)
- Be aware of changes that may be needed in your own diet. Foods prepared for adults may not always be suitable for infants, especially depending on the seasonings used or style of cooking. In one study, babies and their families using a modified baby-led approach were found to consume higher sodium levels (8), so read labels and adjust ingredients as needed.
- Embrace the mess. Baby-led weaning can be FUN, but it can also be MESSY! Have a plan for making cleanup easier, such as bibs that double as “food catchers,” a large mat underneath your highchair as needed, and a good vacuum. It might feel tempting to do so, but hold off on wiping your baby’s face and hands until the end of the meal. You might even consider taking your baby to the sink and letting them rinse their hands and face there afterward.
- Be present with your baby. Sitting down and eating with your baby is not only good practice for safety, but it’s also good practice for modeling good eating habits.
- Discuss your goals with your pediatrician. Letting your pediatrician know the approach you’d like to take with starting solids can be helpful. In addition, baby-led weaning may not be appropriate for some babies with developmental, motor, or medical issues. Consult with your pediatrician, and they can make referrals to health professionals to support you as needed.
How to Start Baby-Led Weaning
So, your baby is at least 6 months old, and you’ve discussed feeding with your pediatrician. Baby is showing you signs they are ready to eat. And you’ve taken steps to prepare yourself too. How do you start? Here are some guidelines:
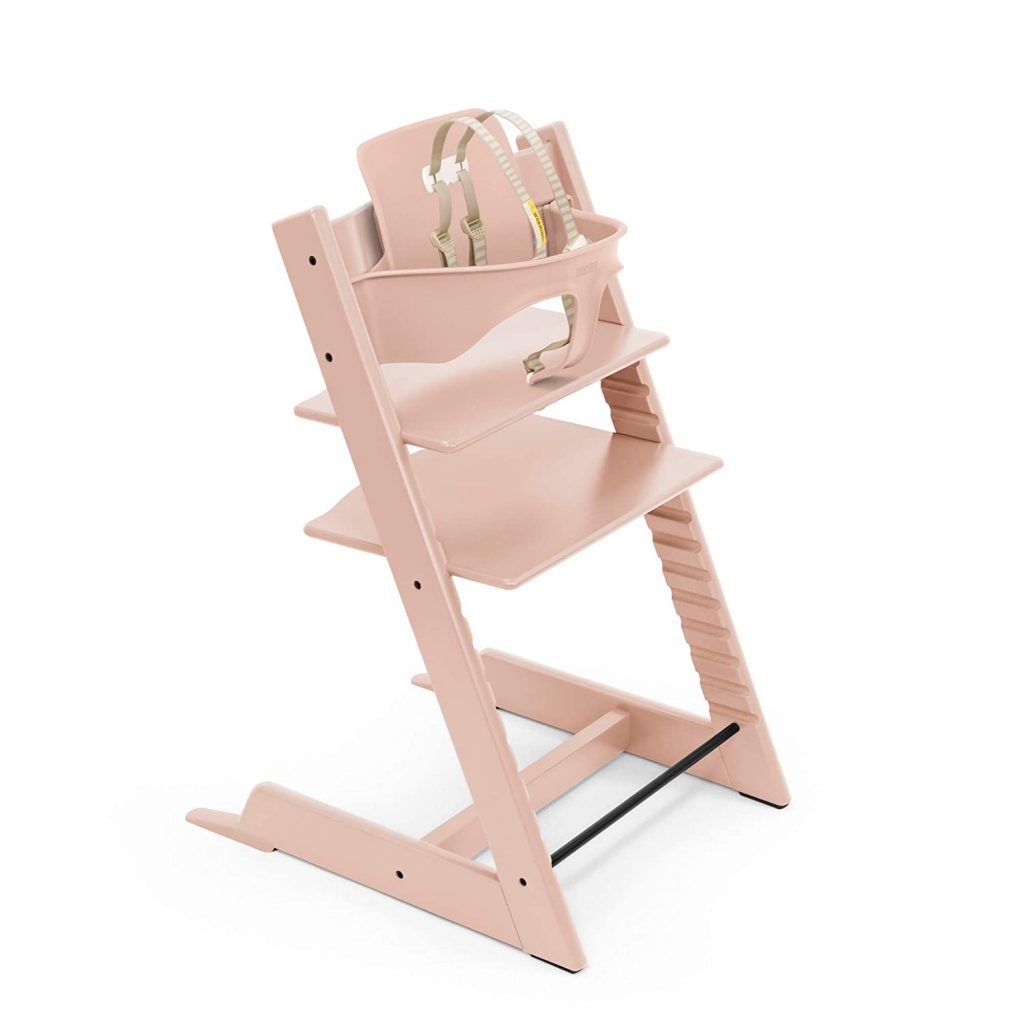
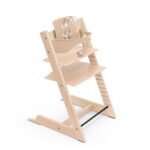
- Always feed your baby in a highchair or booster with good support for their trunk, hips, and feet. Ensure they have a footrest and that hips and knees are positioned as close to 90 degrees as possible.
- Keep it simple and start with 1-3 foods at a time. Avoid putting too large of quantities on the tray or plate. We eat with our mouths as well as our eyes, meaning that sometimes too much food can be visually overwhelming for a beginner eater.
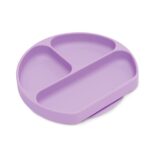
- It’s okay to put food directly on the highchair tray or table. It’s also okay to use those adorable silicone divider plates and bowls you got as baby shower gifts, but know that it’s not mandatory.
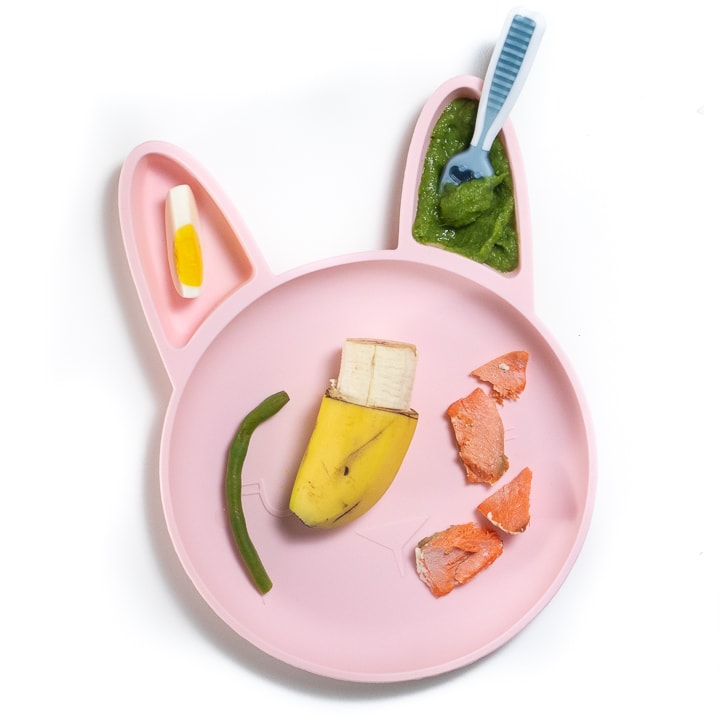
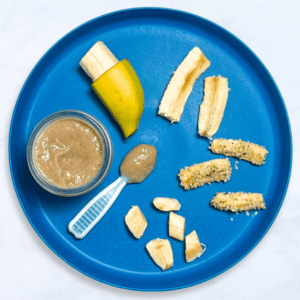
- Ideas for good first foods include soft and ripe fruits like banana or avocado, or soft-cooked veggies like sweet potato or carrots. Cut foods into stick-shaped pieces roughly about the width of two adult fingers to make grasping easier. Or hand baby a pre-loaded utensil with one of the above foods pureed on it. See some of our favorite first foods for baby-led weaning below.
- Always follow your baby’s cues and feed responsively. Let baby determine whether or not she wants to eat a portion of food and how much she wants to eat. Allowing your baby to develop and express feelings of both hunger and fullness will set them up for good eating habits later on in life.
10 Starter Baby-Led Weaning Foods
Not sure which foods to offer first? These 10 foods are nutrient-dense, easy to make and a tasty first food for baby.
For the full recipes, see the recipe card below.
Iron Tip: it’s a great idea to offer baby iron-rich foods as some of their first foods since their iron reserves start to run out around 6 months of age.
Best Baby-Led Weaning Foods by Age
This is a sample of amazing nutrient-dense foods that are great at these ages. But the goal is to always offer a wide variety of foods, textures and tastes to your baby for the first year.
6-7 Month Olds
- Avocado slices
- Banana sliced longways
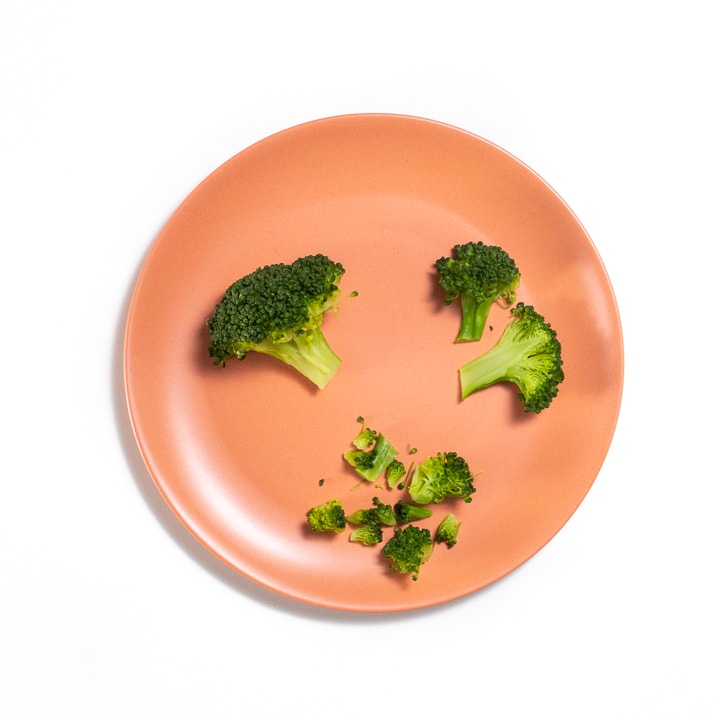
- Steamed broccoli florets
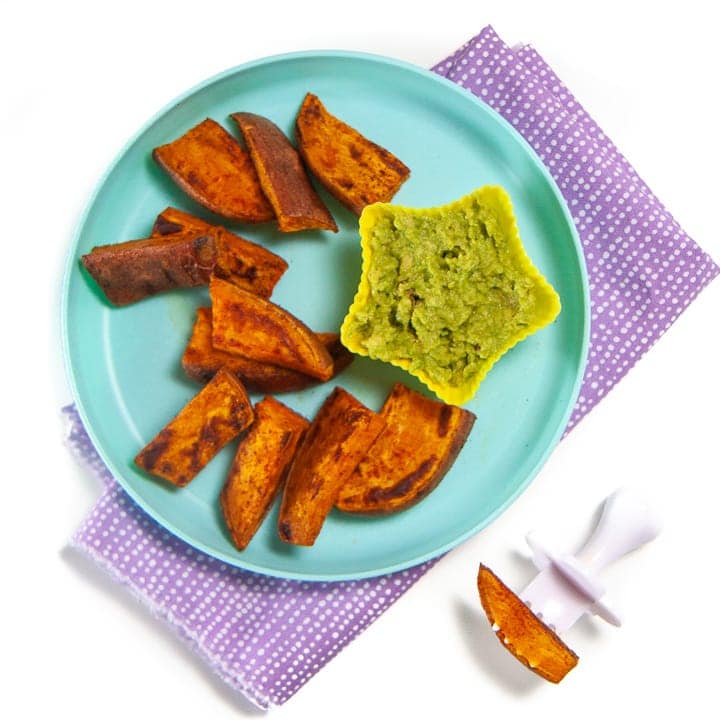
- Baked sweet potato strips
- Steamed tofu strips
- Steamed carrot sticks
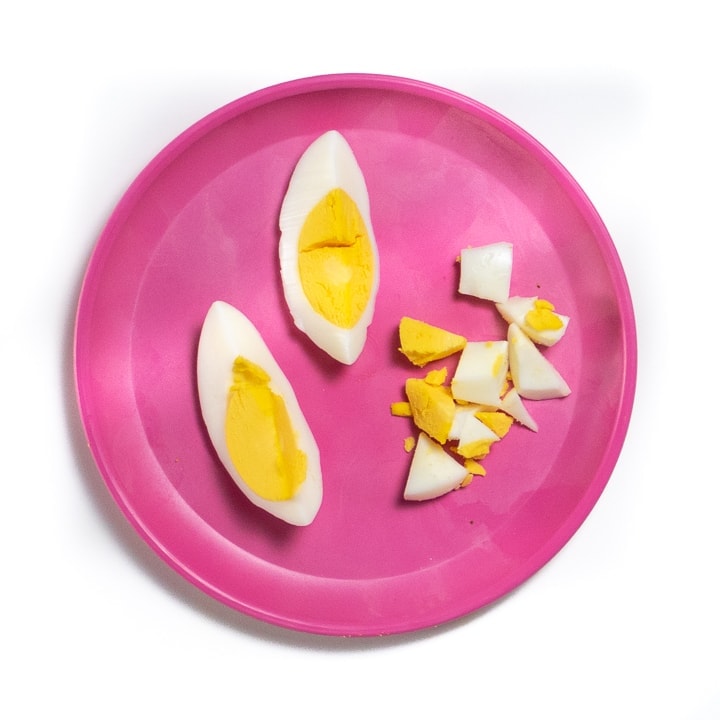
- Quartered hard-boiled eggs
- Mango slices
8-9 Month Olds
- Halved or quartered blueberries
- Halved or quartered raspberries
- Whole or thinly sliced strawberries
- Steamed peas or cooked beans
- Whole grain O’s cereal
- Whole wheat pasta
- Ground meat
10-12 Month Olds
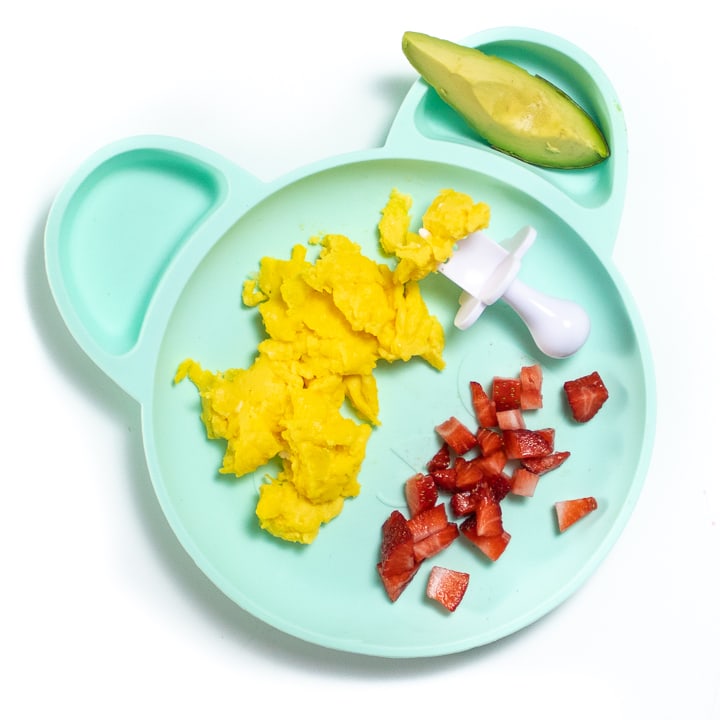
- Scrambled eggs, avocado slices, sliced strawberries, bite-sized pieces of blueberry muffin
- Deconstructed black bean tacos
- Spaghetti and meatballs, cut into bite-sized pieces
- Bite-sized baked chicken, with whole wheat pasta and steamed broccoli
- Baked salmon with steamed peas and carrots and rice
Foods to Avoid
There are some foods that pose a high choking risk to your baby, depending on how it’s prepared, so it’s best to avoid these foods until your baby is developmentally ready, which may not be until 2-4 years of age for some foods.(9)
- Hard, raw fruits and veggies (carrots, apples, celery, etc.)
- Whole cherry or grape tomatoes
- Whole cherries, berries, and grapes
- Melon balls
- Dried fruit (raisins, dates, prunes, etc.)
- Whole and chopped nuts, chunks of nut butters
- Large, tough chunks of meat
- Hot dogs and other meat sticks
- Fish with bones
- Large chunks of cheese
- Tough or hard breads
- Cookies, granola bars
- Popcorn
- Hard candy, jelly beans
- Marshmallows
Some other things to be aware of:
- Honey should be avoided until 1 year of age due to the risk of botulism.
- Undercooked foods like eggs or meat, which can pose a food-borne illness risk, should be avoided.
- Cow’s milk should not be introduced until 1 year of age unless used in baked goods.
- Unpasteurized dairy and lunchmeats should not be served due to the risk of listeria.
- Low-fat versions of foods (vs. full fat) should not be served because babies need fat for growth and development.
- Foods high in salt and sugar can be harmful to babies’ health.

Sample Baby-Led Weaning Feeding Schedule
Aim to feed baby a variety of textures and flavors to help expand her palette, which can help reduce picky eating. Try to make sure you serve at least one iron-rich food per meal to help prevent iron deficiency anemia. To begin, serve soft foods that can easily be mashed with fingers or the tongue. Foods should be in the shape of long strips or sticks so that your baby can grasp it in their fists (see below).
Sample schedule for 6 – 7 month-olds
Most babies are ready to start BLW around six months of age. Start with 1-2 meals a day and keep the same amount of formula or breast milk feedings, usually five. Note that there is not one right schedule for your baby.
7am- 7:30-wake-up, bottle/breastfeed
7:30am-8:30am- play
8:30am-9am- breakfast of banana segments and/or spinach and cheese omelette strips
9am-10:30am- morning nap
10:30am-11am- bottle/breastfeed
11am-12pm-play
12pm-2pm- afternoon nap
2pm- 2:30pm-bottle/breastfeed
2:30-4pm- play
4pm-5pm- cat nap
5pm-5:30pm- bottle/breastfeed
5:30pm- 6:30 pm- play
6:30pm- bath
7pm-7:30pm- bottle/breastfeed
7:30pm-bedtime
Sample schedule for 8 – 9 month-olds
If baby is not eating 2 solid meals a day yet, go ahead and increase solids to twice a day.
7am- 7:30am- wake-up, bottle/breastfeed
7:30-8:30am- play
8:30am – 9am- breakfast of a quartered hard-boiled egg, halved raspberries, whole grain blueberry muffin bites
9am-10:30am- morning nap
10:30am- 11am- bottle/breastfeed
11am-12pm-play
12pm-2pm- afternoon nap
2pm- 2:30pm- bottle/breastfeed
2:30-4pm- play
4pm-5pm- cat nap
5:00pm- 5:30pm- bottle/breastfeed
5:30pm- 6:00 pm- play
6:00pm- 6:30pm- dinner of ground hamburger meat, baked sweet potato sticks, steamed peas and carrots
6:30pm- bath
7pm- 7:30pm- bottle/breastfeed
7:30 pm-bedtime
Sample schedule for 10 – 12-month-olds
By now, baby should be getting 3 meals a day, in addition to formula or breast milk, which is usually reduced to 4 feedings per day.
7am-7:30am- wake up, bottle/breastfeed
7:30am-8:30am- play
8:30am- 9am- breakfast of scrambled eggs, mandarin orange segments, whole grain pancakes
9am-10am- play
10am-12pm- morning nap
12pm- 12:30pm-bottle/breastfeed
12:30pm-1pm- play
1pm- 1:30pm- Lunch of cut up baked chicken, steamed broccoli and rice
1:30pm-2:45 pm- play
2:45pm- 3pm- snack of whole grain O’s, cut up cheese stick and sliced strawberries
3pm- 4:30pm- afternoon nap
4:30pm- 5pm- bottle/breastfeed
5pm-6pm- play
6pm- 6:30pm- Dinner of cut up spaghetti and meatballs with steamed green beans
6:30pm- bath
7pm-7:30pm- bottle/breastfeed
7:30 pm-bedtime
Baby-Led Weaning and Choking
One common concern about baby-led weaning by health professionals, parents, and well-meaning relatives is its safety – does baby-led weaning increase the incidence of choking in infants? Unfortunately, there doesn’t seem to be a definitive answer for this one. The short answer is: possibly not, at least not when families are well educated in the approach and follow guidelines related to high-risk choking foods and foods to avoid.
One study found no difference in choking incidences among groups who followed varying baby-led weaning approaches or parent-led feeding (10). Other studies have found that parents following BLW either report no concerns about choking or if they were nervous about choking when starting BLW, they reported becoming more relaxed and confident with the experience. (11, 12)
Ultimately, you will want to choose a feeding style that you feel comfortable with as a parent, whether that’s baby-led weaning, traditional weaning, or a combination of the two. To be prepared, we recommend you attend a live class in your area or take this online Baby CPR Course.
With any approach you take, it’s important to distinguish between gagging and choking.
Choking vs. Gagging
Although it may still look and feel intense or scary the first time a parent witnesses it, gagging is different than choking.
Gagging
When a baby gags, it is most likely because food that has not been chewed well has gotten too far back in the mouth. The gag reflex is a built-in protective mechanism to protect the airway from food. With practice, your baby learns that they need to chew first, then swallow the food. Fortunately, with continued practice with eating, the gag reflex should lessen over time.
Signs of gagging include:
- sounds, such as coughing or hacking
- baby’s skin may turn red or a darker shade
- baby’s eyes might water
Babies usually recover fairly quickly, and you may see the food come forward in their mouth. Although not as common, vomiting after gagging may happen. During this time, watch closely and do your best to stay calm.
Choking
On the other hand, choking happens when there is a blockage of the upper airway, from food or an object. Complete blockage of the airway prevents a person from breathing effectively. Therefore, choking is a true medical emergency and requires quick intervention on your part.
Signs of choking include:
- baby is quiet
- baby’s skin may turn blueish in color
- baby won’t be able to cry or make much sound
Your baby may become unresponsive or lose consciousness if the food is not cleared. This is why it’s recommended to know CPR before starting solids of any kind.
How to Keep Baby Safe
As a parent of two, I know how scary it can be to introduce solid foods to your baby. With the proper precautions and knowledge, the fears will loosen and feeding your baby can become a wonderful adventure for both of you.
- Avoid high-risk choking foods, as noted above.
- Always supervise with food – sit with your baby and try not to multi-task while your baby is eating.
- Baby should be sitting in an upright position for all meals and snacks, not reclined. If your baby starts to get sleepy during eating, remove food.
- No eating in the car seat unless an adult is in the backseat supervising your baby.
- Do not let baby eat on the go. Once your baby is crawling or walking, avoid letting them move around with food in their mouth or holding food in their hands.
- Check the temperature of foods before offering them.
- Check baby’s mouth after they are done eating. Some babies may pocket food in the sides of their cheeks or get food stuck to the roof of their mouth as they are learning to eat. If you see any food remaining, encourage your baby to keep chewing, spit it out if they need to, or take sips of water or milk. Avoid sticking your finger in your baby’s mouth to get the food out – we want baby to learn how to manage taking care of the food.
How To Cut Foods for BLW
A good rule of thumb to follow is the younger the baby, the bigger the piece of food. I know it sounds counterintuitive, but the bigger the piece of food, allows your baby to hold onto it while chewing and sucking on it without posing as high of a choking hazard. For babies 6-9 months, you will want to cut food into 2-3′ strips or sticks roughly the size of 2 adult fingers. For babies 9-12 months, you can shred or cut food into ‘pea’ size pieces.
6-9 Months
- Bananas: cut a banana in half and trim off 2 inches of the peel furthest away from the stem (see photo above) so your baby has an easy-to-grip handle.
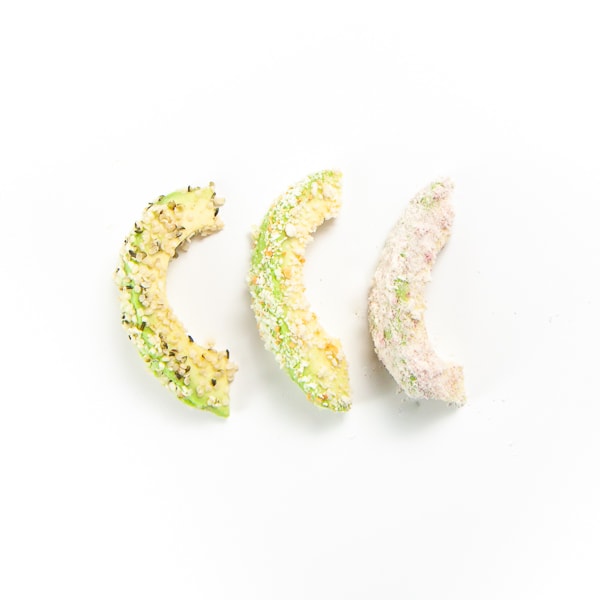
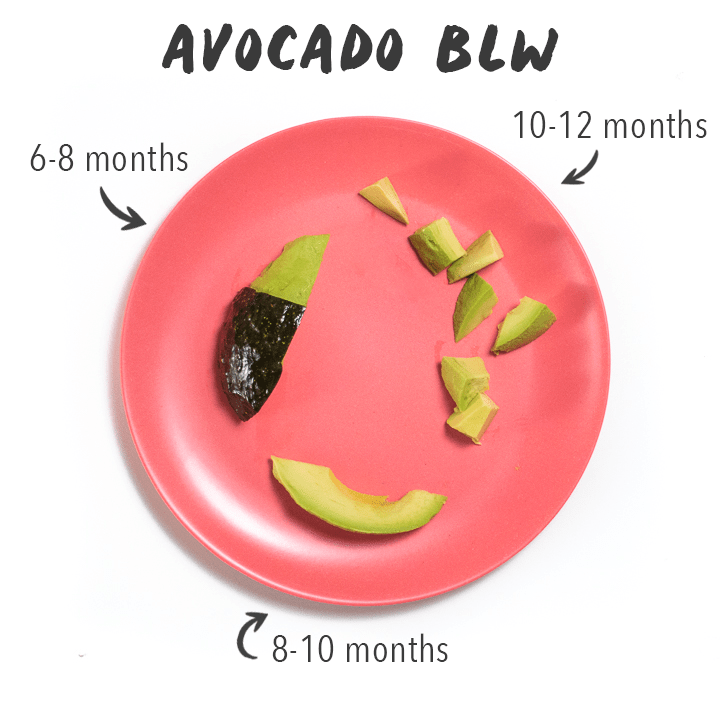
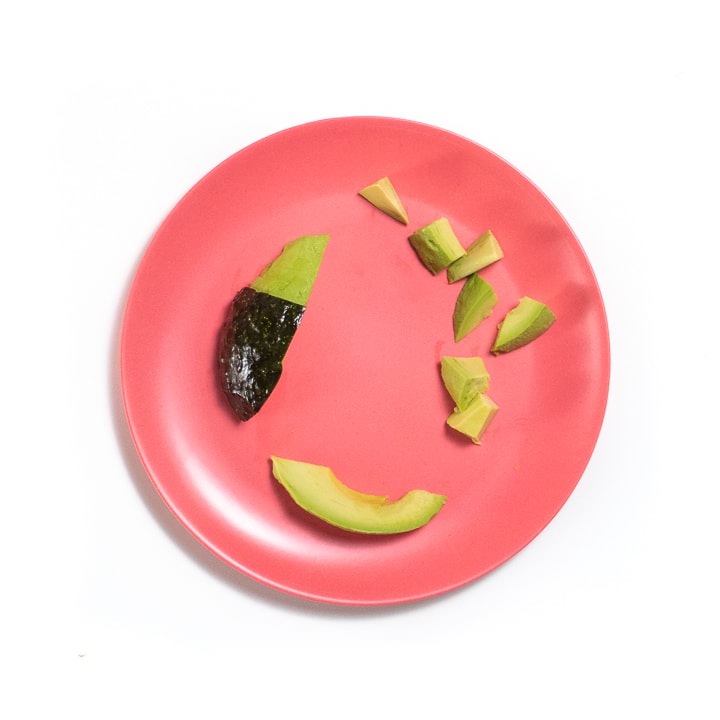
- Avocado: cut avocado into thick slices and leave half of the peel on (see photo above) so your baby has an easy-to-grip handle.
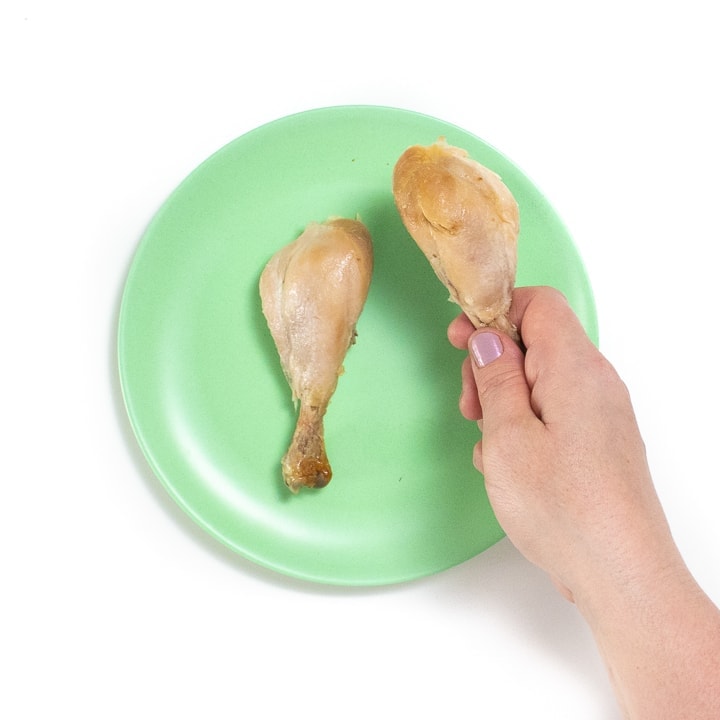
- Meat: cut a thick slice of meat that is the size of two adult fingers or serve your baby a piece of meat on the bone – drumstick, rib, etc.
- Sweet Potato: cut a sweet potato into thick wedges and then steam or roast until tender.
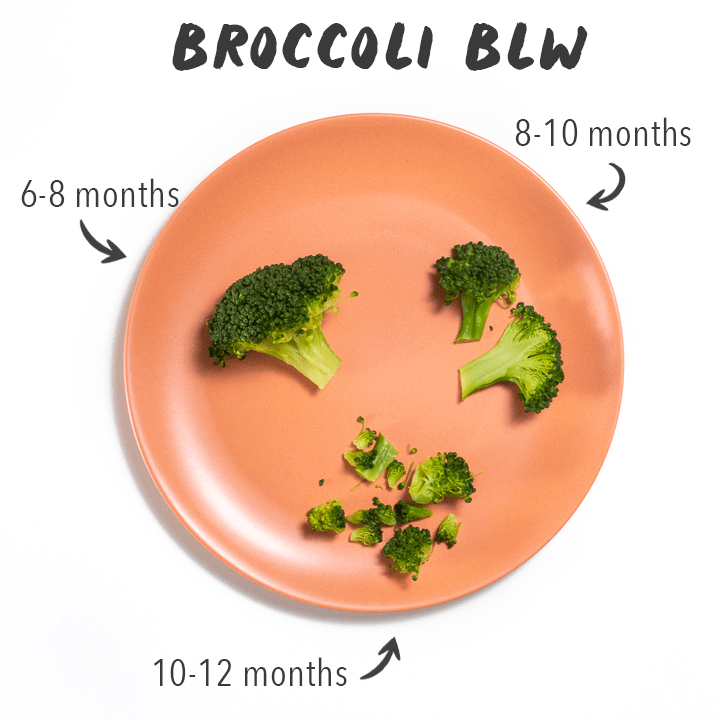
- Broccoli: steam or roast bigger florets until tender.
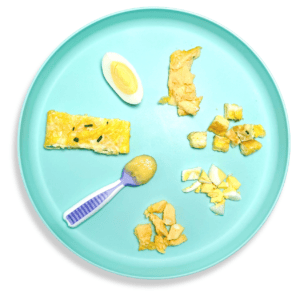
- Eggs: serve strips of omelets or quarters of hard-boiled eggs.
- Apples: cut into slices and steam or sauté until tender.
- Pancakes: serve baby a small or cut in half pancake.
9-12 Months
- Bananas: thin strips of banana that can be rolled in crushed baby puffs or O’s cereal.
- Avocado: thin slices or small chunks of ripe avocado.
- Meat: shredded, thicker strips, ground meat, or long strips of meatballs.
- Sweet Potato: thick wedges or chopped smaller pieces of steamed or roasted sweet potatoes.
- Broccoli: smaller florets or chopped pieces of steamed or roasted broccoli.
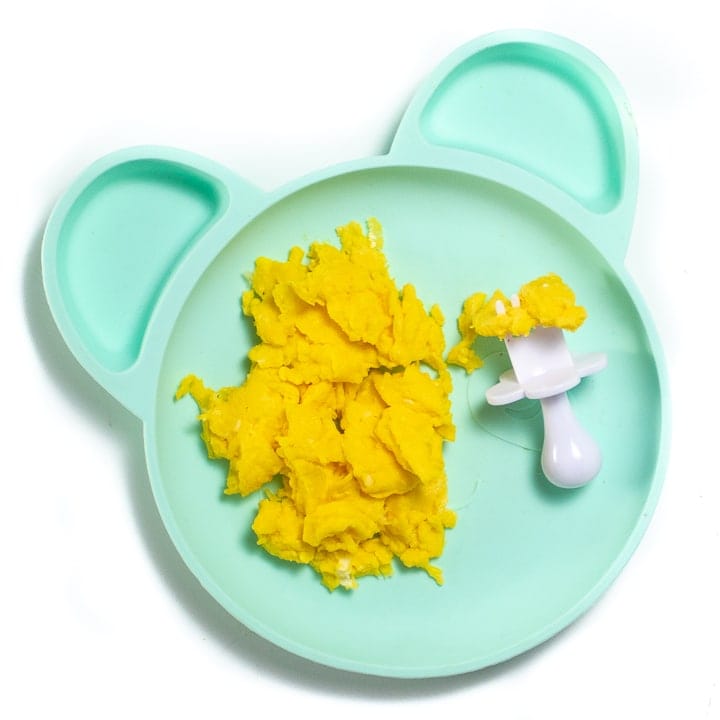
- Eggs: serve quartered or chunks of hard-boiled eggs or scrambled eggs
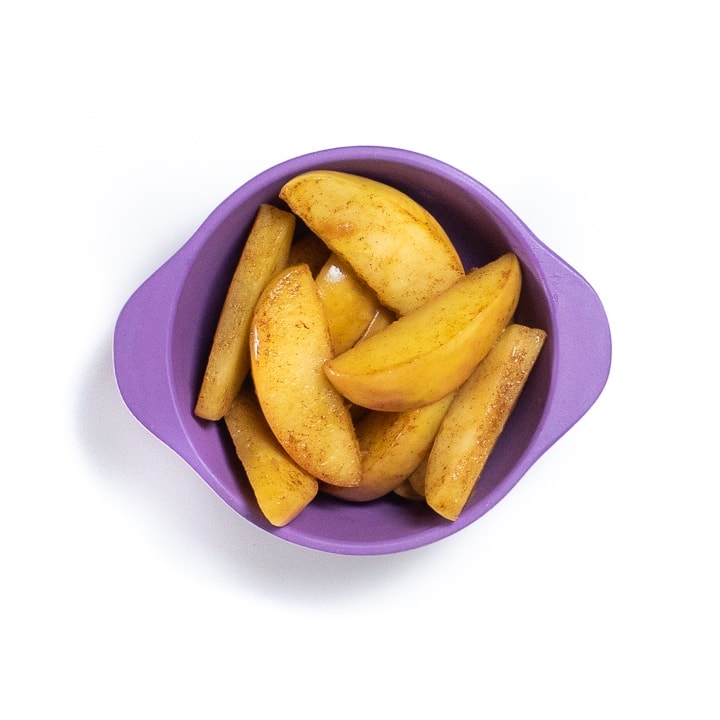
- Apples: cut into slices or chopped into small pieces and steam or sauté until tender.
- Pancakes: serve baby a pancake cut in half or chopped into small pieces.
Palmar and Pincer Grasp
So if your baby is supposed to be self-feeding, you might wonder how exactly they will get the food into their mouth? This is where the palmar grasp and pincer grasp come into play. Although having a pincer grasp is not a requirement for starting self-feeding, being able to grasp and bring items, such as toys or hands, to their mouth (a palmer grasp) is needed.
A pre-requisite to developing a grasp necessary to eating is to make sure your baby is set up with a good solid foundation, aka supported trunk, and feet. Supporting the larger muscles of the body helps your baby control the smaller muscles used for grasping and pinching and makes it easier for your baby to sit for longer periods of time at a meal without getting as frustrated. Read more about How to Find the Best Highchair here.
Palmar grasp and pincer grasp can be confusing, so let’s go over the basics.
Palmar Grasp
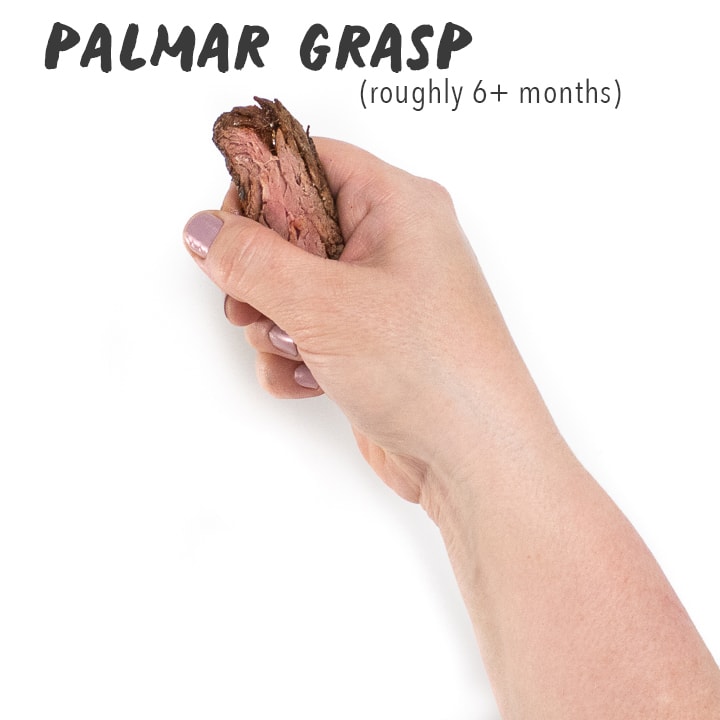
A palmar grasp starts to develop around 5-6 months, making it the first way your baby will move food from their plate to their mouths. This grasp involves all four fingers curling around an object, and the thumb tucked within the palm. The hand begins to accommodate to the shape of an object and touch or “tactile” awareness develops in the hand at this stage.
When using a baby-led weaning or eating approach, this will look like your baby grasping onto stick-shaped foods, with most of the food in the palm of their hand and a small portion of food sticking out of the top of their hand, which is what they will chew on. Or it might look like your baby grasping onto a NumNum Gootensil pre-loaded with a puree to bring to their mouth.
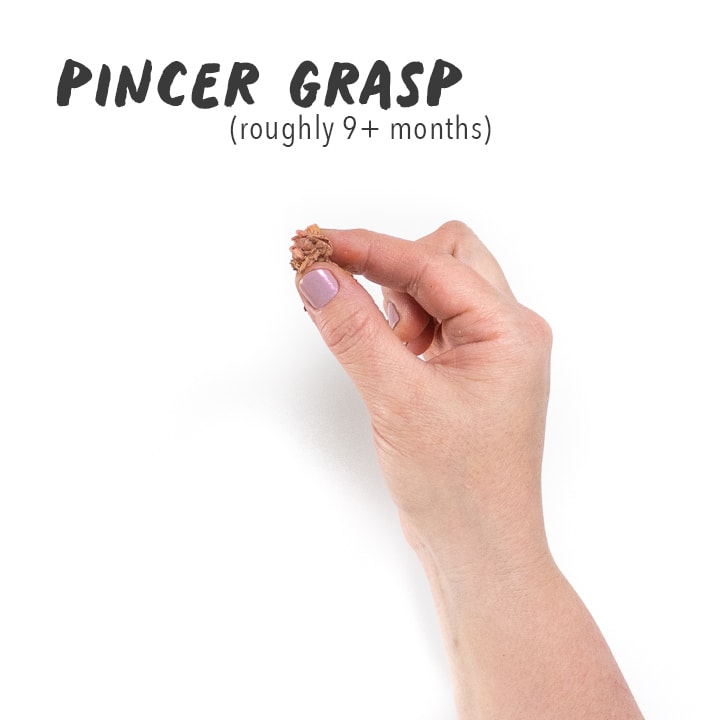
Pincer Grasp
A pincer grasp involves using the tip of the thumb and the index finger to pick up pea-sized foods, such as a cheerio. By 7-8 months, a thumb-finger grasp may be forming, but it may take until the end of your baby’s first year in order to have a well-controlled pincer grasp.
With baby-led weaning, this may start off looking more like a “raking” movement, where your baby straightens and curls their thumb and first two fingers around a small piece of food.
You can continue to offer your baby both larger, stick-shaped pieces of foods and smaller, pea-sized pieces of foods during this time, as your baby will likely switch between using a palmar and pincer grasp, even during the same meal. Eventually baby will progress to using just the tip of their thumb and index finger to pinch as this movement becomes more refined.

How to Teach Baby to Chew
Babies typically begin to mouth or chew on teethers, toys and their hands between 4-6 months. But that doesn’t mean your baby is ready to chew on a piece of steak just yet.
When babies first start chewing, the movement you see is a basic up and down jaw movement, sometimes called munching, that will eventually progress into a mature chewing pattern, called rotary chewing. Throughout this process, babies are also developing side-to-side tongue movements, called tongue lateralization. Tongue lateralization helps your baby push food over to the area where the molars will eventually come in, where the heavy work of chewing happens. As your baby chews the food multiple times, it forms into a little ball or “bolus” of food, which is then transferred to the back of the mouth for swallowing.
Some babies progress along this developmental process of learning to chew and swallow without much assistance, while other babies need a little more help in this area. Parents need to remember that eating is the most complex physical task that children do. In fact, it takes a typically developing child until about 2 years of age to learn to eat a wide variety of foods. The following tips can help build the foundational skills for chewing:
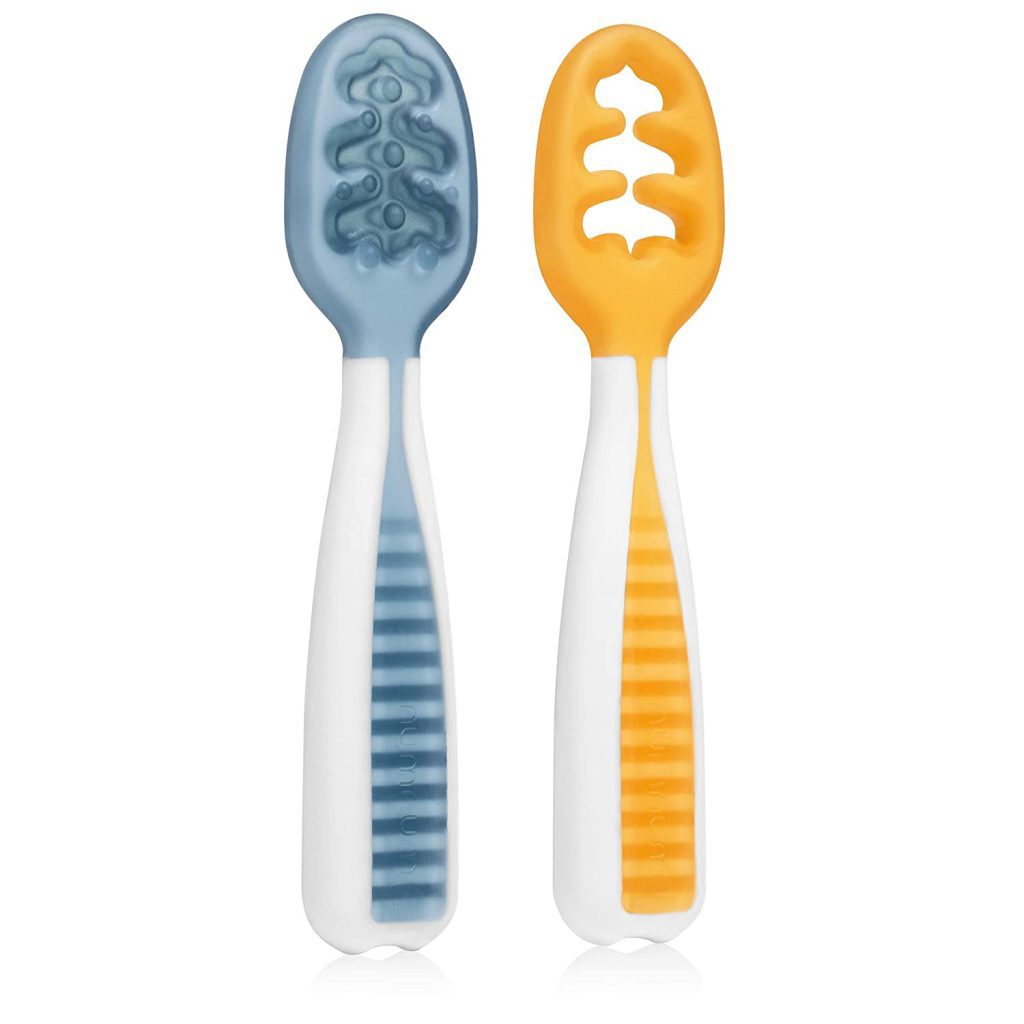
- Offer baby teething toys and encourage baby to move them over to the biting surfaces. This helps with the up and down jaw movements and lateral movements of the tongue needed for chewing. Some favorite teething toys include the Baby Banana Toothbrush, the Comotomo Silicone Baby Teether and ARK’s Textured Grabber. You can also offer utensils such as the NumNum Gootensil or the ChooMee baby spoons as a teether and not just during feeding time.
- Offer baby teething toys and encourage baby to move them over to the biting surfaces. This helps with the up and down jaw movements and lateral movements of the tongue needed for chewing. You can also offer utensils such as the NumNum Gootensil or the ChooMee baby spoons as a teether and not just during feeding time.
- Get in a good habit of gently brushing your baby’s gums and first teeth early on. Babies can chew on an infant toothbrush, such as the Grabease double-sided toothbrush.
- Model, model, model. Sit down with your baby during meal times, eat what they are eating, and exaggerate how you are chewing foods. Yes, you might feel a little silly at first, but baby will love watching and learning about where the food goes in your mouth and want to try it too.
- Don’t be afraid to use purees to teach the concept of swallowing first. Purees can be very helpful for teaching how to swallow, as they help intrinsic tongue muscles develop, preparing your baby to chew and swallow more efficiently. It’s also less common to gag or choke on purees, which may help some babies feel more comfortable when starting the feeding process. With purees, you can even place the spoon to the sides of the mouth as you would with a teether or soft piece of food. Just be sure to help your baby progress beyond only purees in a timely fashion and onto more challenging textures of soft finger foods.
- Use appropriate finger foods, such as crackers or biscuits that melt easily, soft cooked veggies cut into strips or fruits that squish nicely, such as avocado or banana. Cutting foods into thin stick or strip shapes can help with placing foods on the sides for chewing.
Baby-Led Weaning Products
- highchair
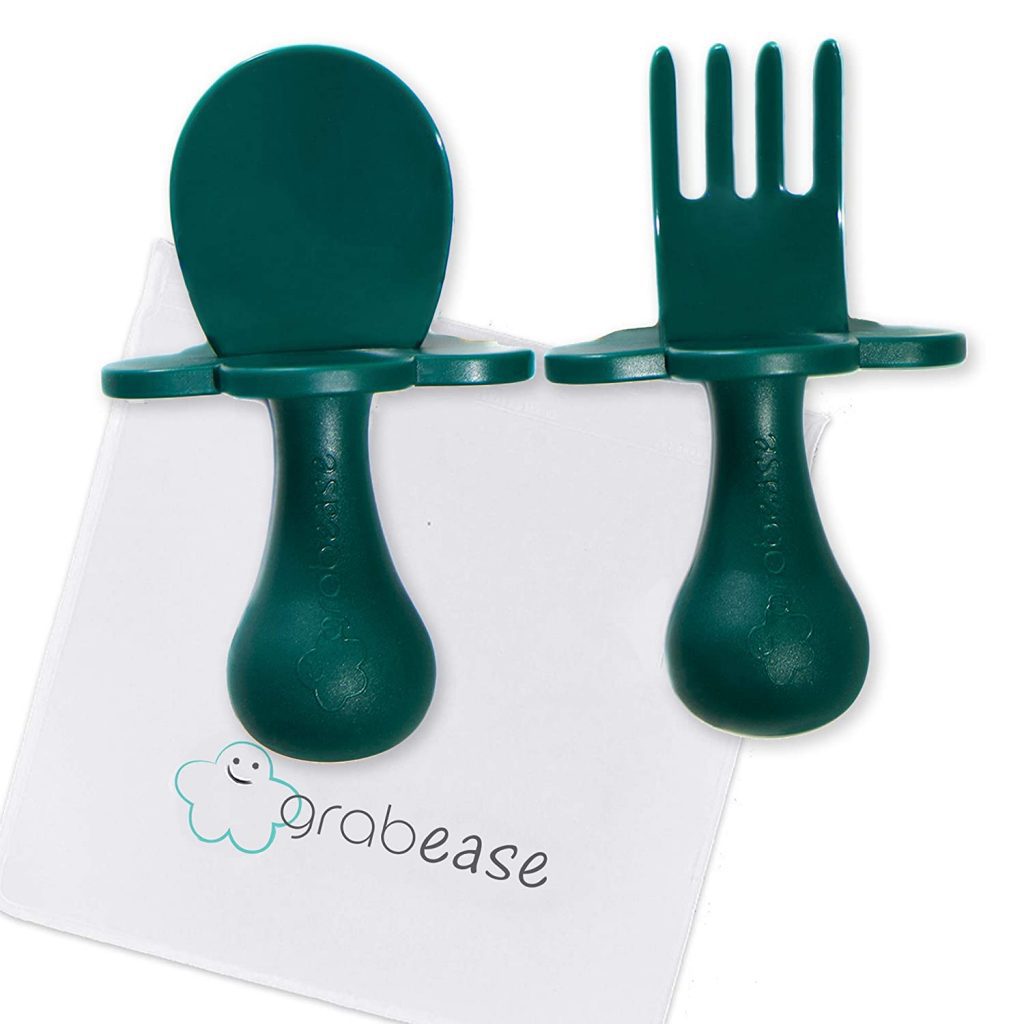
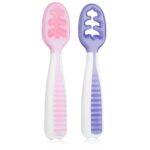
- easy to hold fork and spoon
- GOOtensils
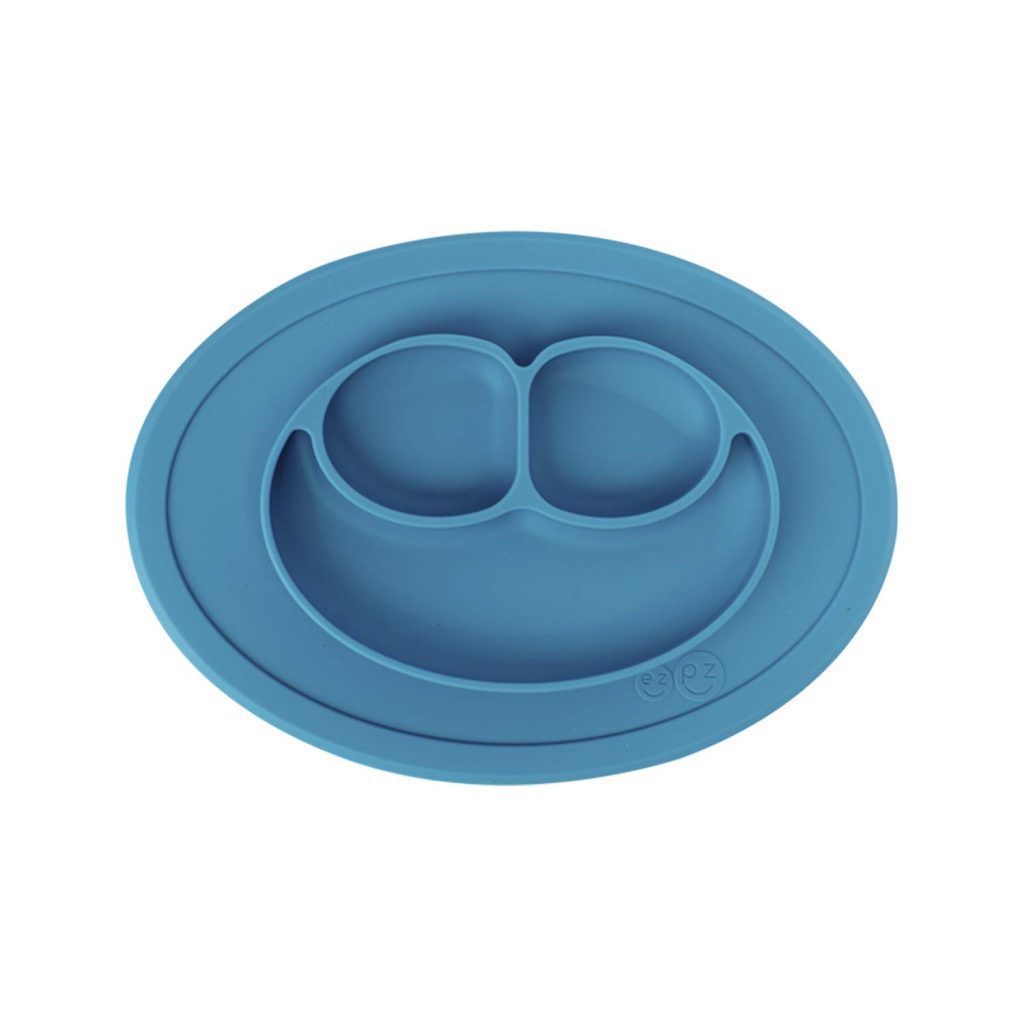
- bowl or sectioned plate
- open lid cup
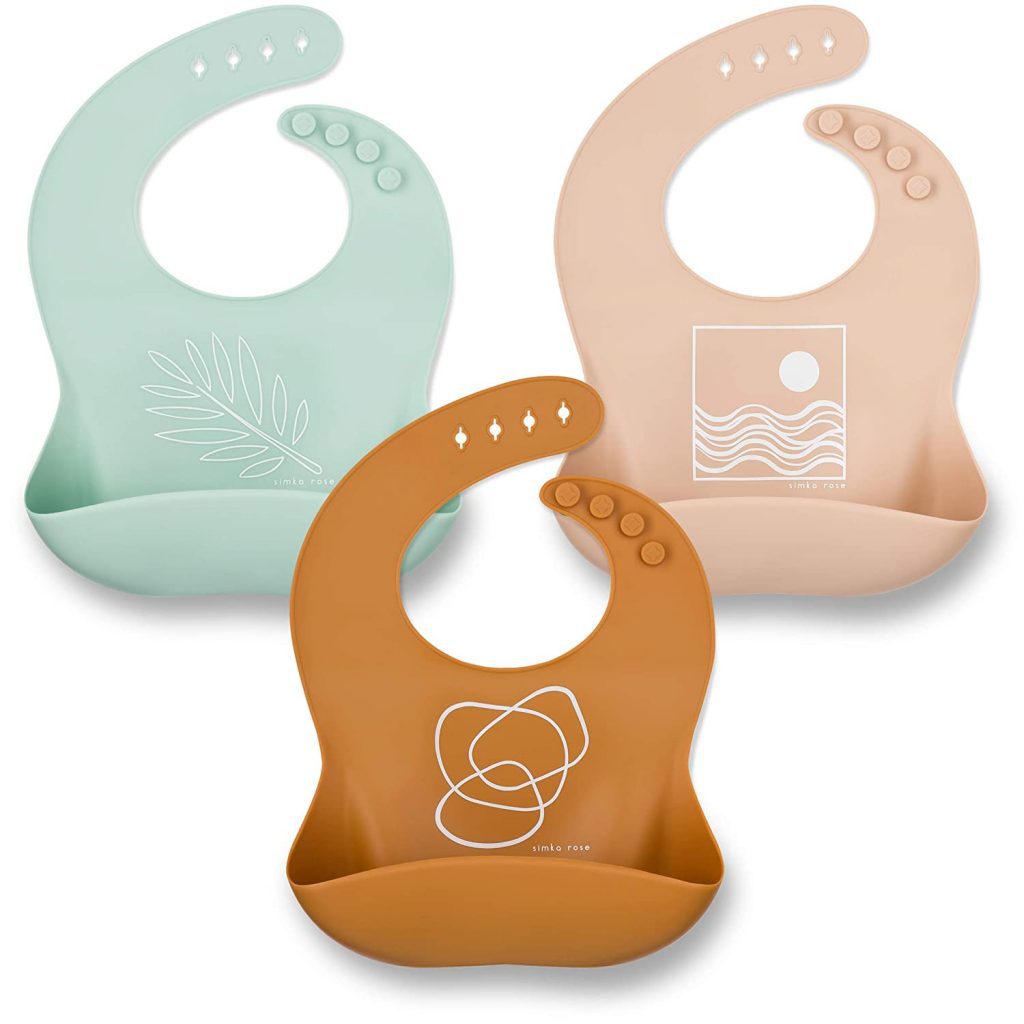
- bib with catch pocket
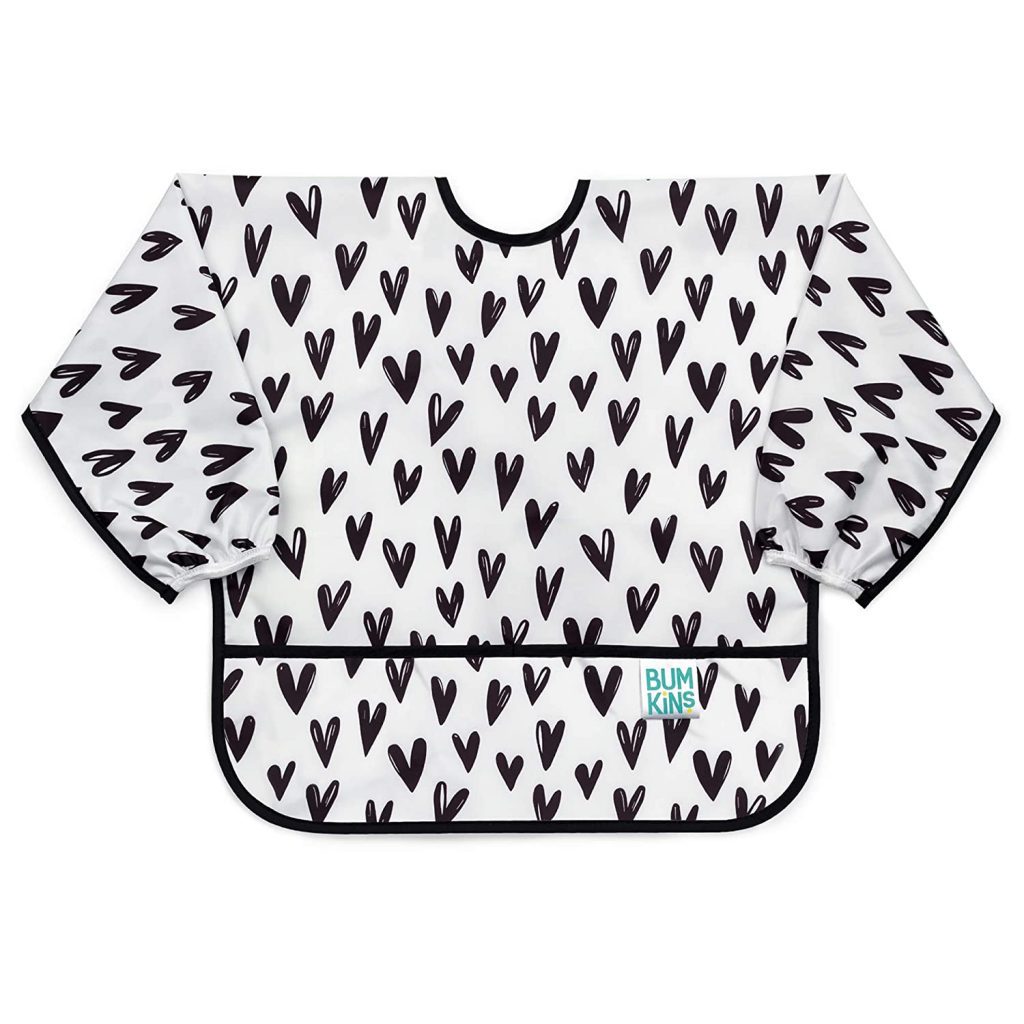
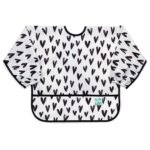
- sleeved bib
- splat mat to cover the floor
- wavy crinkle cutting tool
- grape cutter
- baby wipes
Frequently Asked Questions
This is totally up to your baby. Some babies have a larger appetite than others, so it’s hard to know, but generally, babies eat around 4 ounces of food per meal (13). If it is more or less than this, do not worry. Babies get most of their nutrition from formula or breast milk until they turn 1 year old.
The question of how babies can chew foods without teeth makes any parent scratch their heads! But in reality, we all chew food with our back molars, not our front teeth, which baby doesn’t get until 18-22 months of age. Good thing babies have super tough and strong gums, which they use to mash, gnaw and chew foods. Baby’s gums are better at chewing food than you would think, and your baby will be able to chew more foods the older they get, even without their molars.
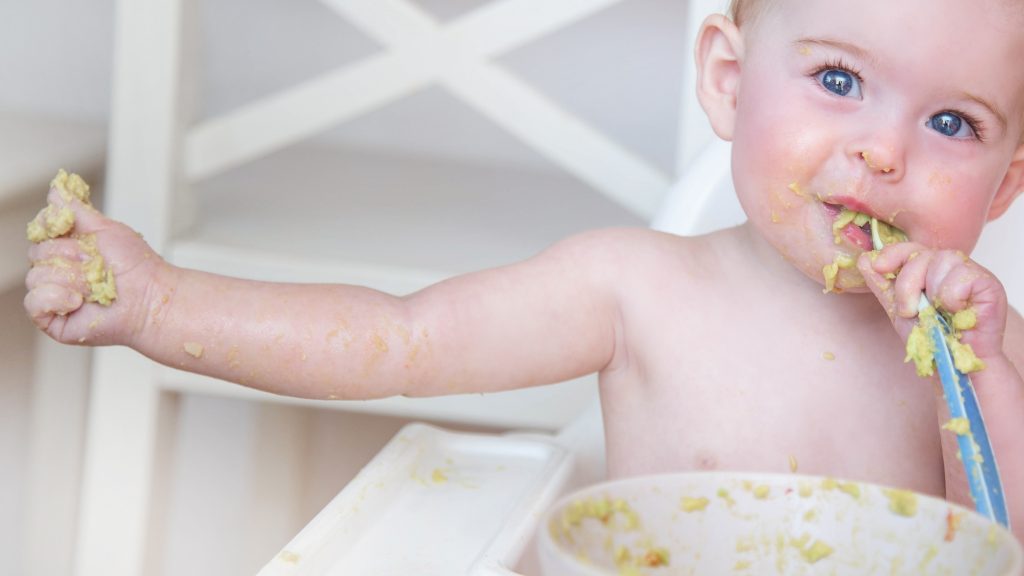
Embrace the Mess
Baby-led weaning can be FUN but it can also be MESSY! Have a plan for making clean-up easier, such as bibs that double as “food catchers,” a large mat underneath your highchair as needed, and a good vacuum (or dog;). It might feel tempting to do so, but hold off on wiping your baby’s face and hands until the end of the meal. You might even consider taking your baby to the sink and letting them rinse their hands and face there afterward.
During Meal Time
- Bibs: Invest in several ‘catch-all’ bibs or full-body bibs to help your baby stay clean.
- Let Baby Play: as tempting as it is, it’s best to hold off wiping baby’s face and hands until the end of a meal. You want them to explore and play with their food as they eat it.
- Protect your Floors: Lay a large towel or spill mat underneath the high chair to help keep your floors clean.
Clean Up
- Towels at the Ready: Have paper towels, microfiber towels, or wipes handy to clean up the high chair and floor.
- Clean Baby at Sink: One way to clean up your baby is that you can take them directly to the sink to have them help wash their hands and face. Simply hold them over the sink and have a gentle stream of warm water to run their hands through.
- Wash Baby’s Hands in a Bowl: You can also try bringing over a small bowl of warm water to your baby and place it on their highchair for them to carefully play in while also washing their hands.
Absolutely! Both purees and solid foods are great ways to introduce your baby to new flavors and textures. Babies actually learn to swallow liquids first, whether in the form of breastmilk or bottles. Purees are similar to offering liquid that’s been thickened a bit, so this can help with introducing your baby to a texture change and getting practice with swallowing a solid food. Just consider limiting the amount of times you switch back and forth between soft solids and purees during each meal, at least when your baby is first learning to eat. Instead, you could offer a veggie puree as the “appetizer” before soft solids at one meal, or yogurt as the “dessert” at another meal.
How to serve Purees for BLW
Yes, it can be done! You can offer purees and still allow your baby to lead the way with self-feeding. Here are some tips:
- Start with thin purees (i.e. thin pureed fruits and vegetables) and progress to slightly thicker ones (i.e. mashed sweet potatoes or avocados, Greek yogurt, hummus).
- Place a few spoonfuls of purees directly on the tray or in a bowl for your baby to dip fingers into. Model how to dip your fingers into the puree and bring them to your mouth, to taste some.
- Offer baby a pre-loaded utensil (NumNum Gootensil) and hold it out for them to grasp or set on their tray.
- Use a solid food as a dipper. You can also offer a soft stick-shaped piece of food, such as a soft roasted carrot or bread lightly toasted and cut into strips to dip into the puree.
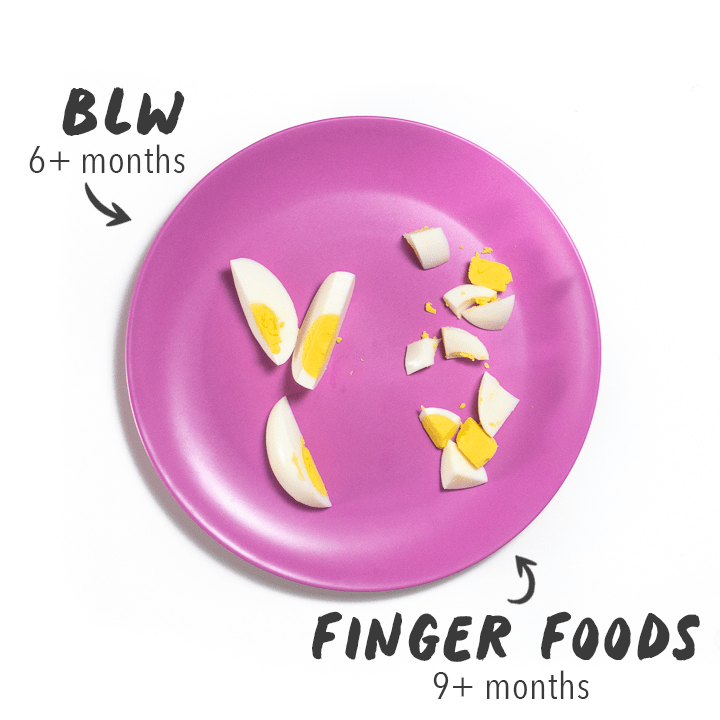
Difference between Baby-Led Weaning and Finger Foods?
The main difference between baby-led weaning and finger foods is the age at which you introduce the solid foods to your baby. Baby-led weaning usually starts around 6 months of age and is the feeding style where you would skip the spoon-fed purees stage and move right into solid foods. If you go with the more traditional feeding model, you will introduce your baby to finger foods around 9 months of age after you have already introduced your baby to stage one, stage two, and stage three purees.
Because of this age difference, the shape and sizes of the foods you offer baby may differ slightly as you usually offer bigger pieces of food the younger the baby. All other principles and concepts of baby-led weaning apply to the finger food stage.
BLW Feeding Tips
- Mess: Relax, things will get messy but nothing some paper towels can’t handle. Let baby play with and explore all the new foods. You may want to strip your baby and let her eat naked, so she doesn’t ruin her outfit or use a “catch-all” bib that will help catch any food baby’s mouth misses so it doesn’t all end up on the floor.
- Limit Distractions: make sure your baby isn’t distracted with things such as toys, TV, a pet, your phone, etc. while they are eating.
- Know the difference between choking and gagging: Gagging is a perfectly normal part of trying new foods but can easily be mistaken for choking. A gagging baby will be able to make noise, such as coughing, but a choking baby will look terrified, won’t be able to cough, and may have blue lips.
- Serve Soft Foods: Foods should be soft enough so that they can “squish” with gentle pressure between your thumb and index finger. Not so soft that they fall apart in your baby’s hand, but soft enough so that no hard, small pieces break off. Most people think about steaming or cooking vegetables only, but keep in mind this will mean that you’ll also need to steam some fruits, too, depending on what you are offering.
- Same Meal… Sort of: While one of the biggest perks of doing the baby-led weaning approach with your baby is that they can eat the same foods as you… sort of. While the goal is to have one meal for the entire family, you will want to hold off on adding the salt, hot spices, store-bought sauces, and sugar to their foods. For the first couple of months, this may mean making a meal without those ingredients and then adding them to the grown-up options – make pasta with broccoli but hold the sauce for baby, cook a stir fry but hold the sauce until you have a portion for baby, etc.
- Give Baby a better grip as needed: Roll slippery or hard to grasp slices of soft foods, such as avocado or banana strips in finely crushed crumbs, such as those from plain cheerios or teething biscuits.
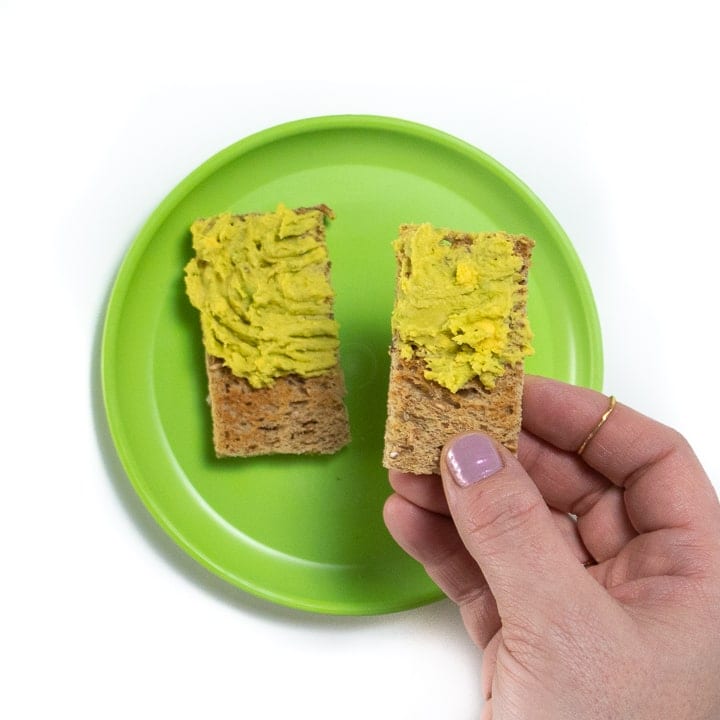
- Serve Food in Different Ways: Experiment with offering the same food in different ways – for example, your baby could try raspberries plain one day, pureed and stirred into oatmeal with nut butter the next day, and smashed with cream cheese on top of toast another day.
- Establish a schedule: make a plan for when you will offer eating opportunities. Ideally, this will be close to, or at the same time that the rest of the family is eating, but making a plan ahead of time for when you’ll offer foods can still be helpful. You can start by offering 1 or 2 eating opportunities a day between breast or bottle feeds and slowly progressing to 3 meals and 1-2 snacks from there.
- Be present with baby: Sitting down and eating with your baby is not only good practice for safety, but it’s also good practice for modeling good eating habits.
- Consider temperature: some babies prefer room temp, while others might like cooler or slightly warm foods.
Top-Rated Recipes for Baby-Led Weaning
Ready to get started with baby-led weaning? Then give these fan-favorite 5-star rating recipes a try! You can make them as a finger food or a puree that you can serve to your baby on a self-feeding spoon.
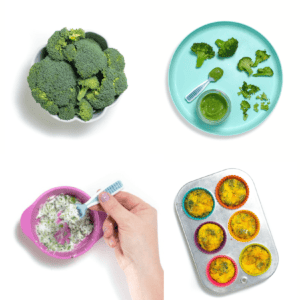
Broccoli for Baby-Led Weaning
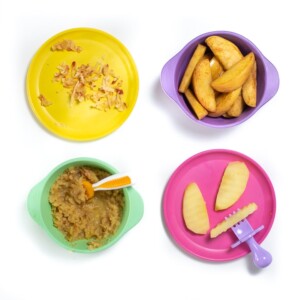
Apples for Baby-Led Weaning
Banana for Baby: Puree & BLW

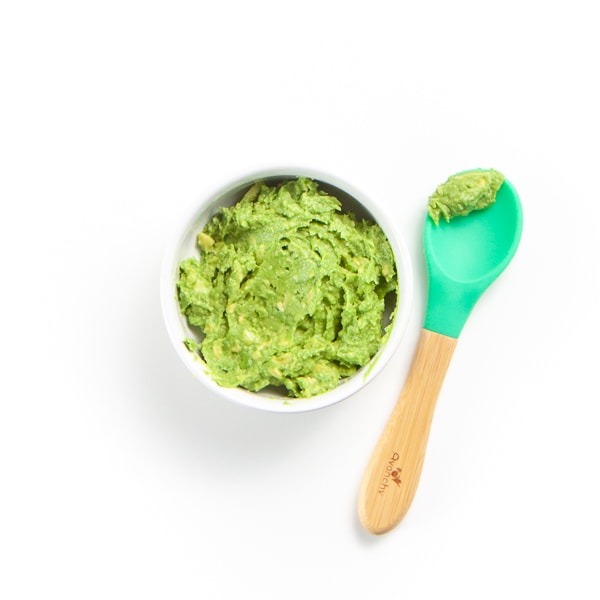
The Best Avocado Baby Food – Puree & BLW
The Best Way to Serve Eggs to Baby (puree & baby-led weaning)
Get the recipe: Complete Guide to Baby-Led Weaning: 10 Starter Foods
Ingredients
Avocado
- 1/4 avocado, ripe
Banana
- 1/2 banana
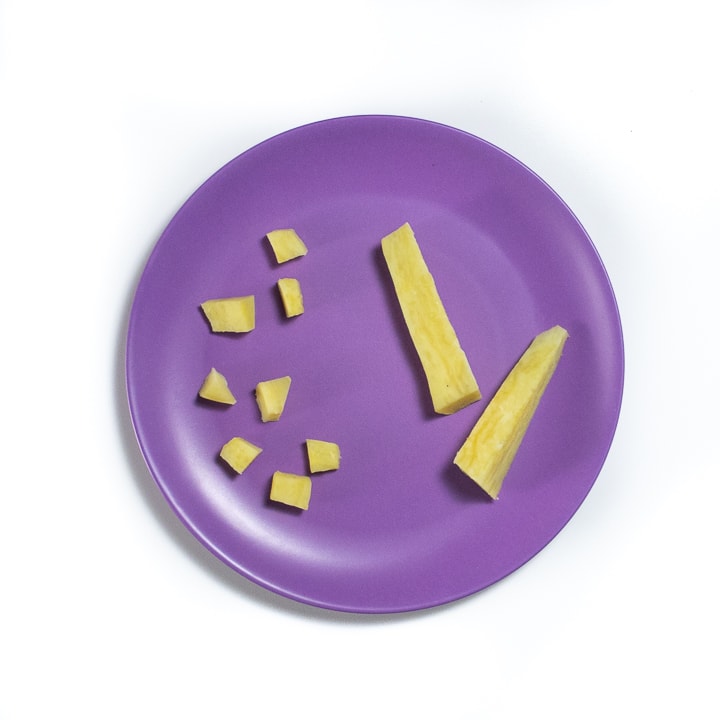
Sweet Potatoes
- 1/2 small sweet potato, peeled and cut into pieces the size of 2 adult fingers (I used white sweet potatoes for this recipe)
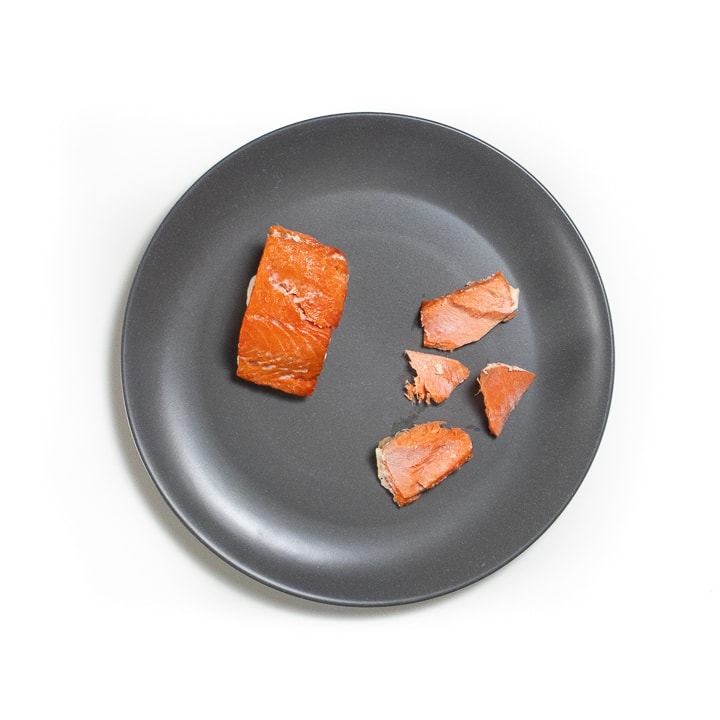
Salmon
- 1 4-6 ounce wild salmon
- 1/2 tsp olive oil
Broccoli
- 1-2 cups large broccoli florets
Oven Roasted Chicken Drumstick
- 3 chicken drumsticks
- 1 tsp olive oil
- pinch paprika, cumin or mild chili powder
Hard-Boiled Eggs
- 1 hard-boiled egg, peeled
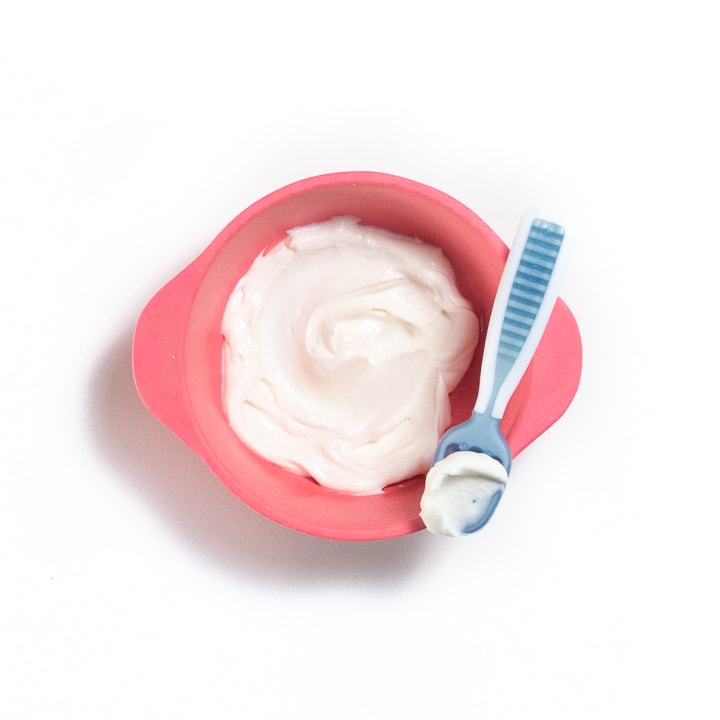
Yogurt
- 1-2 tbsp plain whole fat yogurt,
Oatmeal
- 1/2 cup old-fashioned oats
- 1 cup water
- pinch cinnamon, cloves or nutmeg
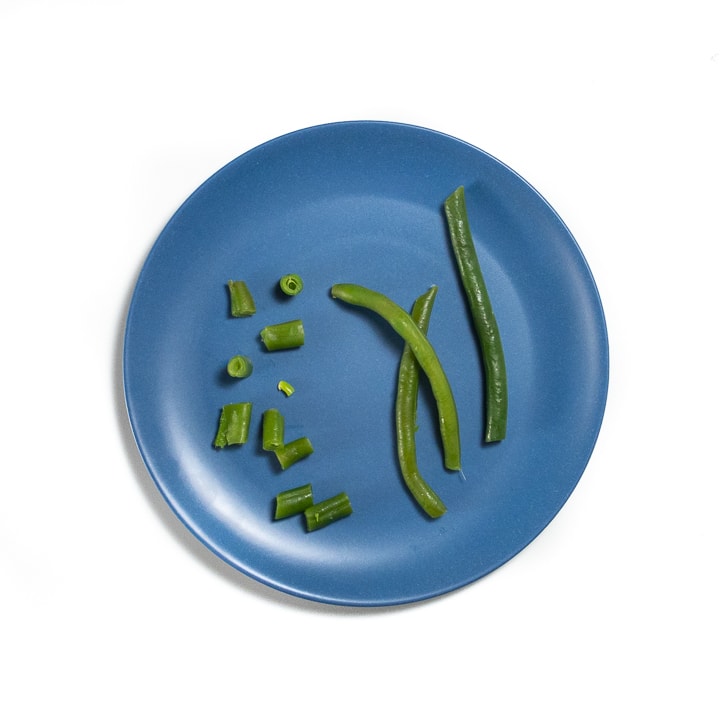
Green Beans
- 1 cup green beans, trimmed
Instructions
Avocado
- Avocado with Peel (6+ months): Cut a slice of avocado with the peel on. Using a sharp knife, cut the peel 1/3-1/2 the way up the side of the avocado until you get to the flesh. Do not cut all the way through the avocado slice. Take the peel off and serve the avocado slice to your baby with them holding the peel that is still on the avocado.
- Slices (8+ months): peel the avocado and then cut into 1/4 inch slices.
- Chunks (10+ months): peel the avocado and then cut into small chunks.

Banana
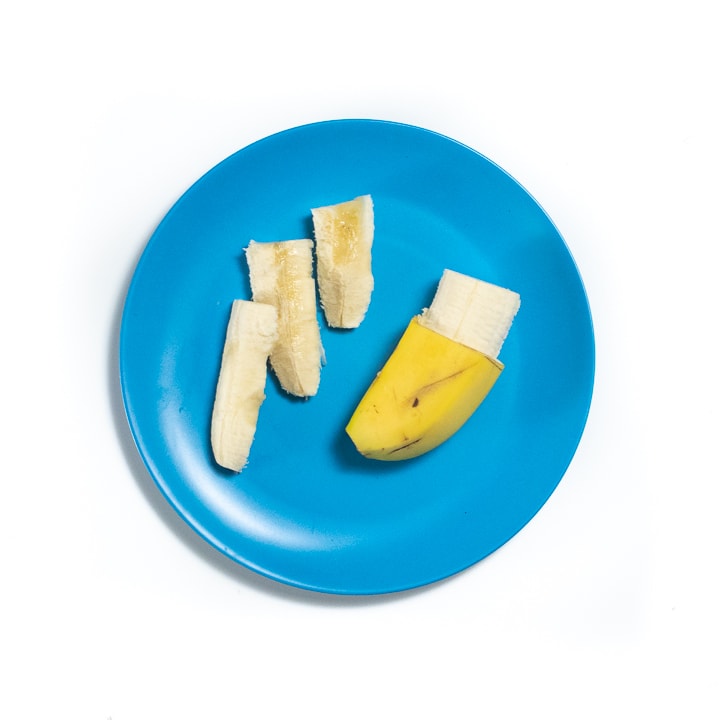
- Handheld Banana (6+ months): Cut a 4-5 inch section of banana off from the top. Cut off the peel, leaving roughly 1-2 inches of exposed banana. Do not cut all the way through the banana, just the peel. Then you can remove the peel away and hand the stem of the banana to your baby.
- Strips (6-7+ months): Peel half of a banana and using your fingernails, break the banana into chunks along the inside center of the banana. It should easily break into strips. This method makes the banana not so slippery for your baby to pick up.
Steamed Sweet Potatoes
- Strips (6+ months) or Small Pieces (9+ months): In a medium saucepan, bring 2″ of water to a boil over medium heat. Place the strips of sweet potato into a steamer basket, cover, and cook for 9-11 minutes or until tender. Let cool slightly. If serving for older babies, you can use the strips into small "pea" size pieces.
Salmon
- Preheat oven to 350° F. Lightly spray a baking sheet with cooking oil or olive oil. Place the salmon on the baking sheet and rub the top of the salmon with olive oil. Bake for 12-15 minutes, or until cooked through but not dry. Let cool slightly. Take off the skin.
- Whole Piece (6+ months) or Salmon Flakes (9+ months): you can serve your baby a strip of salmon the size of two adult fingers or you can flake off small pieces of the salmon and serve to babies 9 months and older.
Steamed Broccoli
- Big Florets (6+ months), Sliced Florets (8+ months) or Small Pieces (9+ months): In a medium saucepan, bring 2″ of water to a boil over medium heat. Place the florets into a steamer basket, cover, and cook for 7-10 minutes or until tender. Let cool slightly. Serve whole for babies 6-8 months, slice the florets for babies 8+ months or chop into small pieces for babies 9+ months.
Oven Roasted Chicken Drumstick
- Drumsticks (6+ months): Preheat the oven to 425° F. Line a baking sheet with foil and spray with a cooking spray. Lay chicken on the baking sheet and run with olive oil and spice (if using). Bake in the oven for 25 minutes, flip the chicken and cook for an additional 5-10 minutes or until the internal temperature reaches 165° F. Let cool slightly. Remove skin and any hard parts of the chicken.

Hard-Boiled Eggs
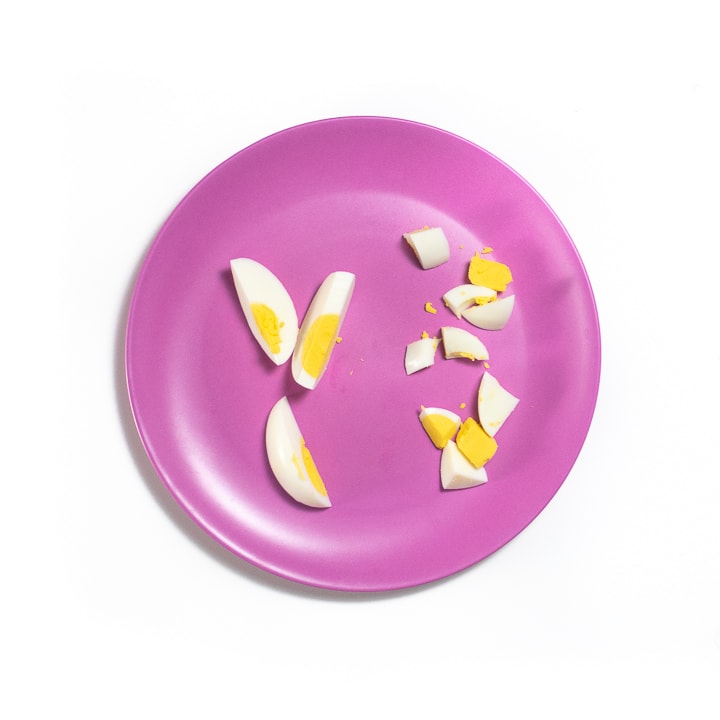
- Quartered (6+ months) or Chopped (9+ months): Place a peeled hard-boiled egg on a cutting board and cut into quarters or "pea" size pieces for baby.
Yogurt
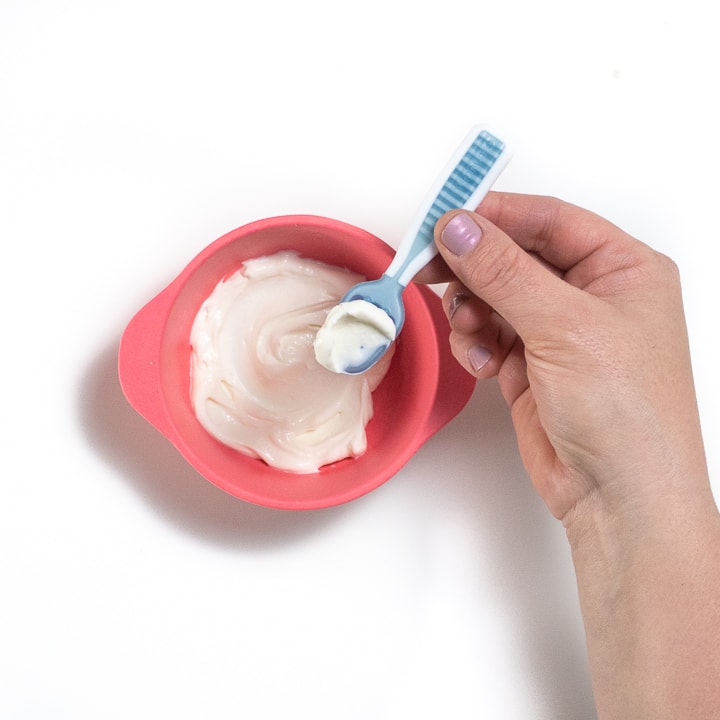
- Spoon Loaded (6+ months): place the yogurt in a baby bowl and then preload a baby spoon with the yogurt and hand the spoon to baby.
- On Tray (6+ months): place a tablespoon or two of yogurt directly on your baby's high chair tray and then have them explore and eat the yogurt at their own pace.
BLW Oatmeal
- Chunks (6+ months): In a medium saucepan, bring 1 cup of water to a boil. Add in 1/2 cup of old-fashioned oats along with any spices you are using. Turn down the heat to medium-low and cook the oats for 5 minutes, stirring occasionally, or until all of the water is gone and the oats are soft. Let cool slightly then spoon some heaps of oats onto a plate or small baking sheet and place in the fridge for 20-30 minutes until cool. This will make the oats a little stiffer and easier for your baby to pick up.
Steamed Green Beans
- Whole (6+ months) or Small Pieces (9+ months): In a medium saucepan, bring 2″ of water to a boil over medium heat. Place the green beans into a steamer basket, cover, and cook for 9-11 minutes or until tender. Let cool slightly. If serving for older babies, you can cut the green beans into small "pea" size pieces.
Notes
Did you make this recipe?
Tag @babyfoode on Instagram and hashtag it #babyfoode!
Sources:
(1) Daniels, L., Heath, AL.M., Williams, S.M. et al. Baby-Led Introduction to SolidS (BLISS) study: a randomised controlled trial of a baby-led approach to complementary feeding. BMC Pediatr 15, 179 (2015). https://doi.org/10.1186/s12887-015-0491-8
(2) https://pubmed.ncbi.nlm.nih.gov/24347496/
(3) Brown A, Lee MD. Early influences on child satiety-responsiveness: the role of weaning style. Pediatric obesity. 2015;10(1):57–66.
(4) Chantal L. Verhage, Marleen Gillebaart, Shelley M.C. van der Veek, Carel M.J.L. Vereijken. The relation between family meals and health of infants and toddlers: A review. Appetite. 2018; Vol. 127: 97-109.
(5) Coulthard, H., G. Harris, and P. Emmett. “Delayed Introduction of Lumpy Foods to Children During the Complementary Feeding Period Affects Child’s Food Acceptance and Feeding at 7 Years of Age.” Maternal & Child Nutrition 5 (2009): 75–85.
(6) Brown A, Lee M. Maternal control of child feeding during the weaning period: differences between mothers following a baby-led or standard weaning approach. Matern Child Health J. 2011;15(8):1265–71.
(7) Fangupo LJ, Heath AL, Williams SM, Williams LW, Morison BJ, Fleming EA, Taylor BJ, Wheeler BJ, Taylor RW. A baby-led approach to eating solids and risk of choking. Pediatrics. 2016;19:e20160772.
(8) Rogers SL, Blissett J. Breastfeeding duration and its relation to weight gain, eating behaviours and positive maternal feeding practices in infancy. Appetite. 2017;108:399–406.
(9) Centers for Disease Control and Prevention. (2020, December 11). Choking Hazards. Centers for Disease Control and Prevention. https://www.cdc.gov/nutrition/infantandtoddlernutrition/foods-and-drinks/choking-hazards.html.
(10) Cameron SL, Taylor RW, Heath AL. Parent-led or baby-led? Associations between complementary feeding practices and health-related behaviours in a survey of New Zealand families. BMJ Open. 2013;3(12):e003946.
(11) Cameron SL, Heath AL, Taylor RW. Healthcare professionals’ and mothers’ knowledge of, attitudes to and experiences with, baby-led weaning: a content analysis study. BMJ Open. 2012;2(6):e001542.
(12) Brown A, Lee M. An exploration of experiences of mothers following a baby-led weaning style: developmental readiness for complementary foods. Maternal & child nutrition. 2013;9(2):233–43.
(13) American Academy of Pediatrics. (2017, March 17). Starting Solid Foods. HealthyChildren.org. https://www.healthychildren.org/English/ages-stages/baby/feeding-nutrition/Pages/Starting-Solid-Foods.aspx.

7 Comments on “Complete Guide to Baby-Led Weaning”
Can the oatmeal chuncks be made ahead of time and frozen?
I actually have never tried this but I don’t see why not. I would freeze the cooked oatmeal heaps on a cookie sheet, freeze and then reheat in the microwave. If you try it, please let us know how it works.
Thank you from the bottom of my heart!!! I started BLW , but felt discouraged and all over the place. This information is so helpful! If my daughter is soon to be 10 months , but has only had the basic banana, avocado and cheerios foods and eats once -twice a day can I start at the 10 month schedule (3meqls a day?) or do I contours till she is ready? Thank you so much
I’m so glad you found this guide helpful! I would suggest she start at the 6 or 8-month schedule and then work up to the 10-month schedule as she progresses.
This is such a thorough, awesome guide for BLW – thank you so much. Our son is 6 months old and can’t get enough purees so we’d like to try this!
So glad you found this guide helpful! Let me know how your BLW journey goes:)
My baby is 1 year 3 months. Can I receive a free recipes to give my handsome baby boy to grow healthy.