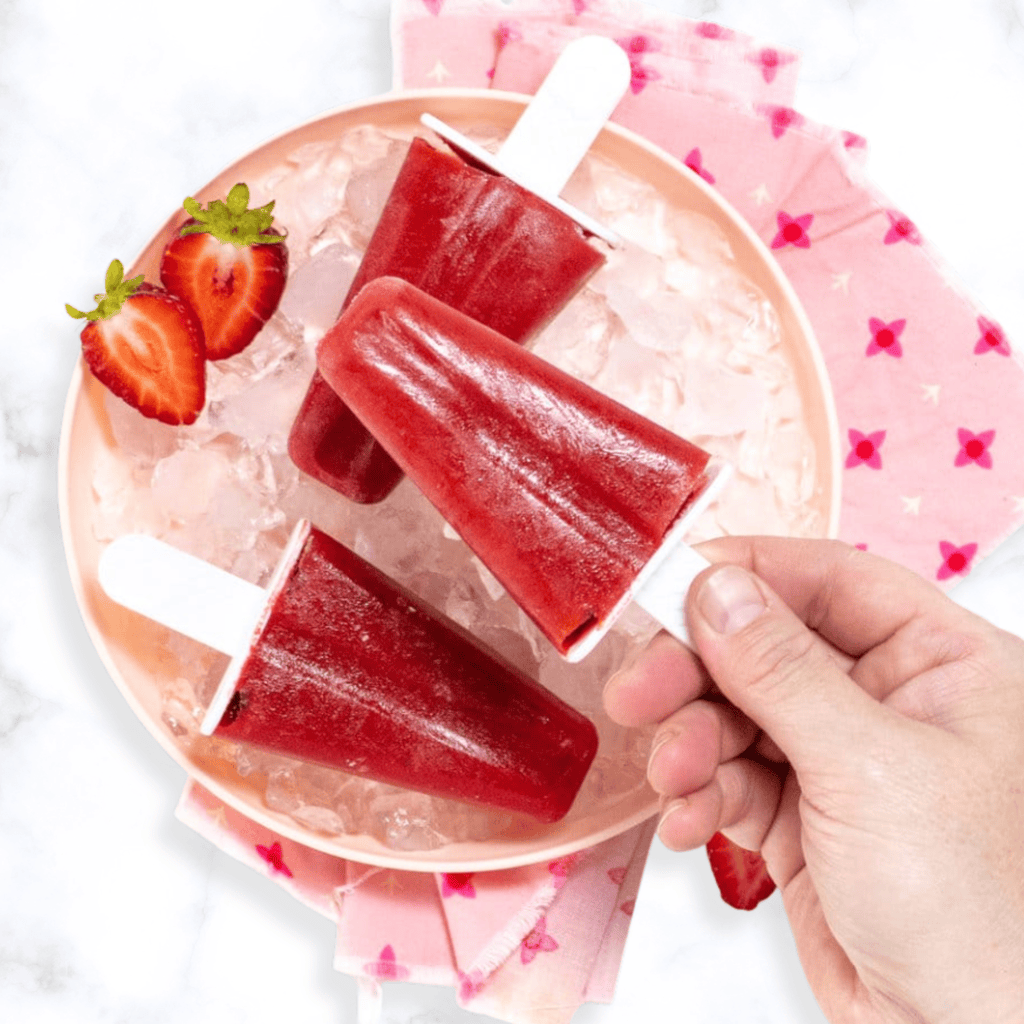
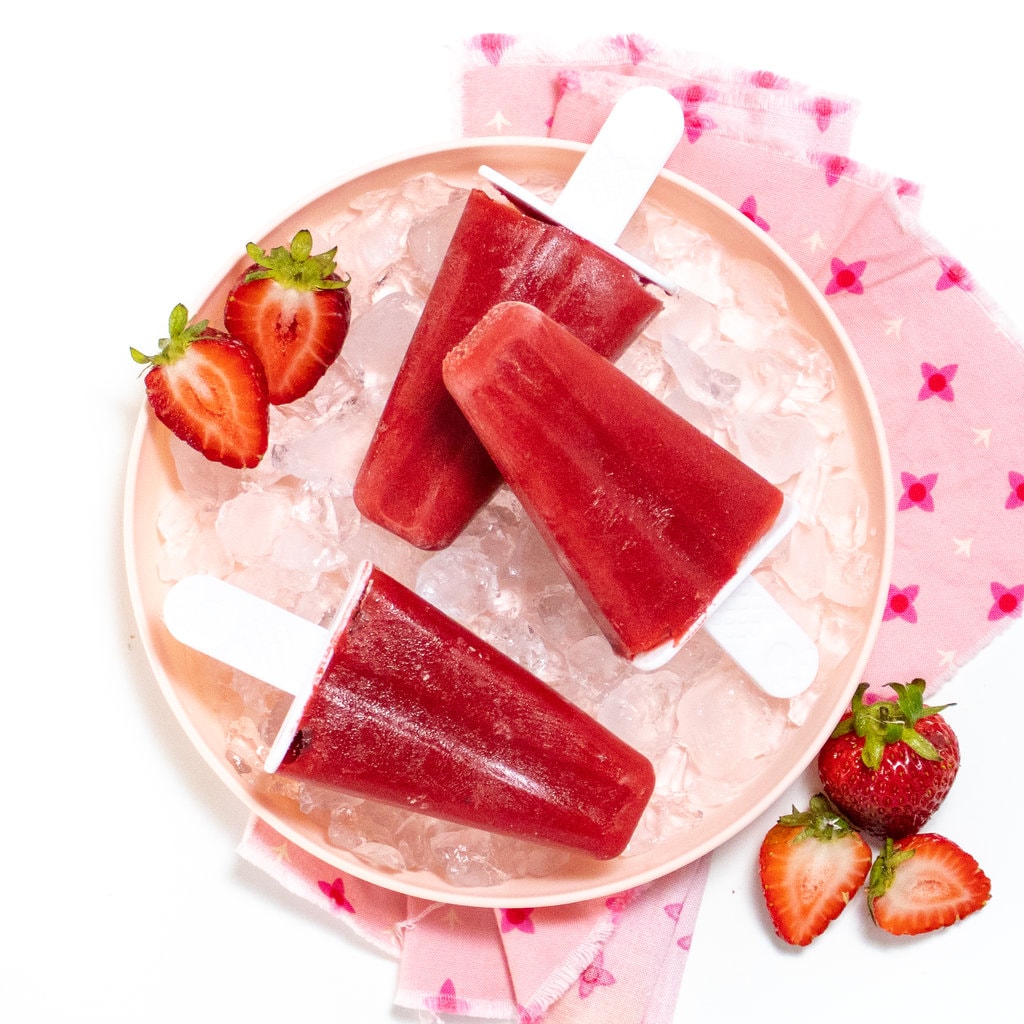
Irresistible 4-Ingredient Strawberry Popsicles (with a hidden veggie)
Prepped and ready for the freezer within minutes, these 4-ingredient strawberry popsicles are the ultimate summer treat. So refreshingly irresistible, these popsicles are going to be a hit! Naturally sweetened and full of sweet strawberry flavor, your kids will ask for them on repeat! PLUS.. they have a hidden veggie!
The first time I made strawberry popsicles, I kept it simple — just strawberries and a little honey blended together and poured into molds. And… they were fine. But not great. What I really wanted was a super concentrated, bursting-with-strawberry flavor in frozen form. These were not that.
Then I had a lightbulb moment — what if I simmered the strawberries first? Add a squeeze of lemon to brighten the flavor, a drizzle of honey to enhance the sweetness, and even a handful of shredded carrots (because, let’s be honest, summer nutrition can be a little all over the place).
Call it a stroke of genius from the popsicle gods… because it worked. The result? A bold, ultra-strawberry popsicle that’s packed with all the fresh, summery flavor I was craving.
I love these healthy strawberry popsicles for so many reasons:
🍓 Refreshing and hydrating — perfect for hot summer days
🍓 Quick to make — just 10 minutes of prep with simple, wholesome ingredients
🍓 Kid-approved fun — a snack they can enjoy while playing outside
And honestly, they’re one of my favorite ways to sneak in a little extra fruit (and veggies!) without any pushback. Because at the end of the day, it’s a popsicle on a stick — and that’s always a win.
Strawberry Popsicle Video
Ingredients

It’s Prep and Freeze Time –>
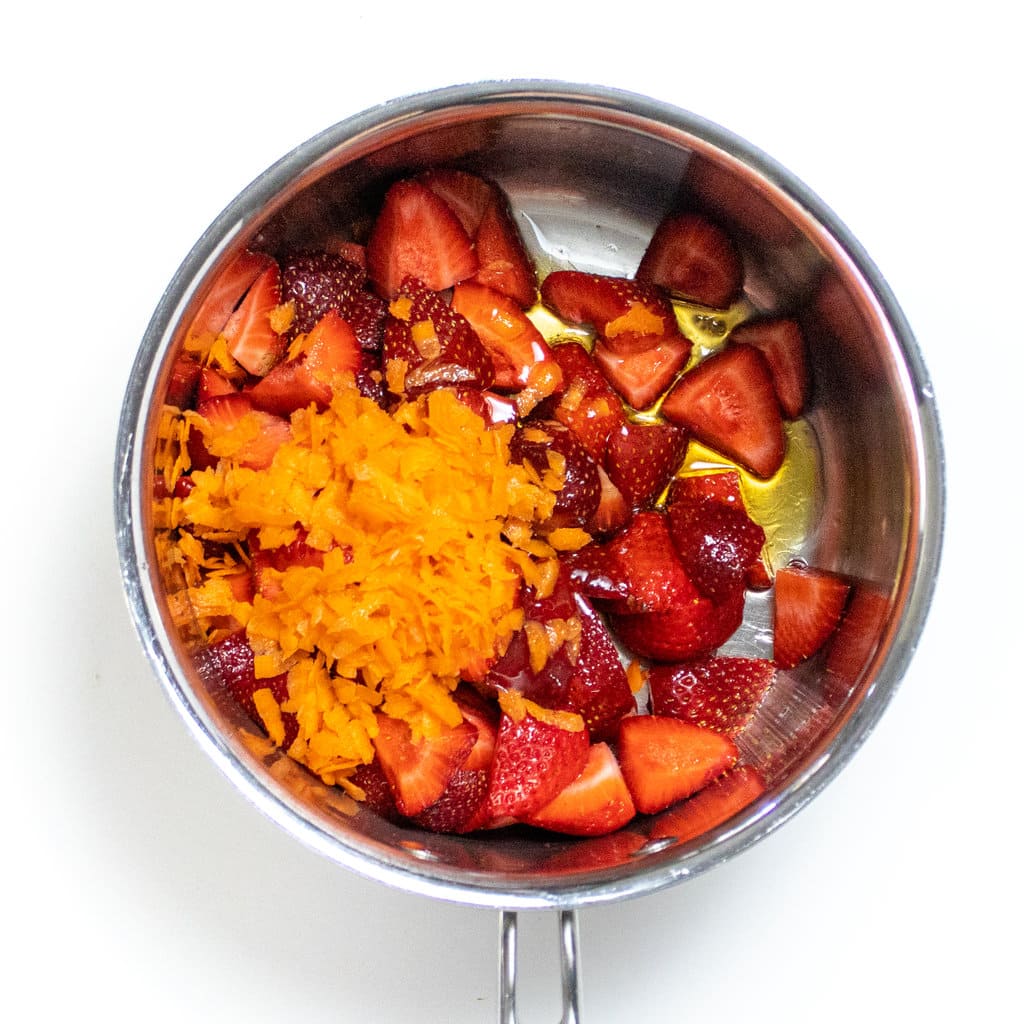
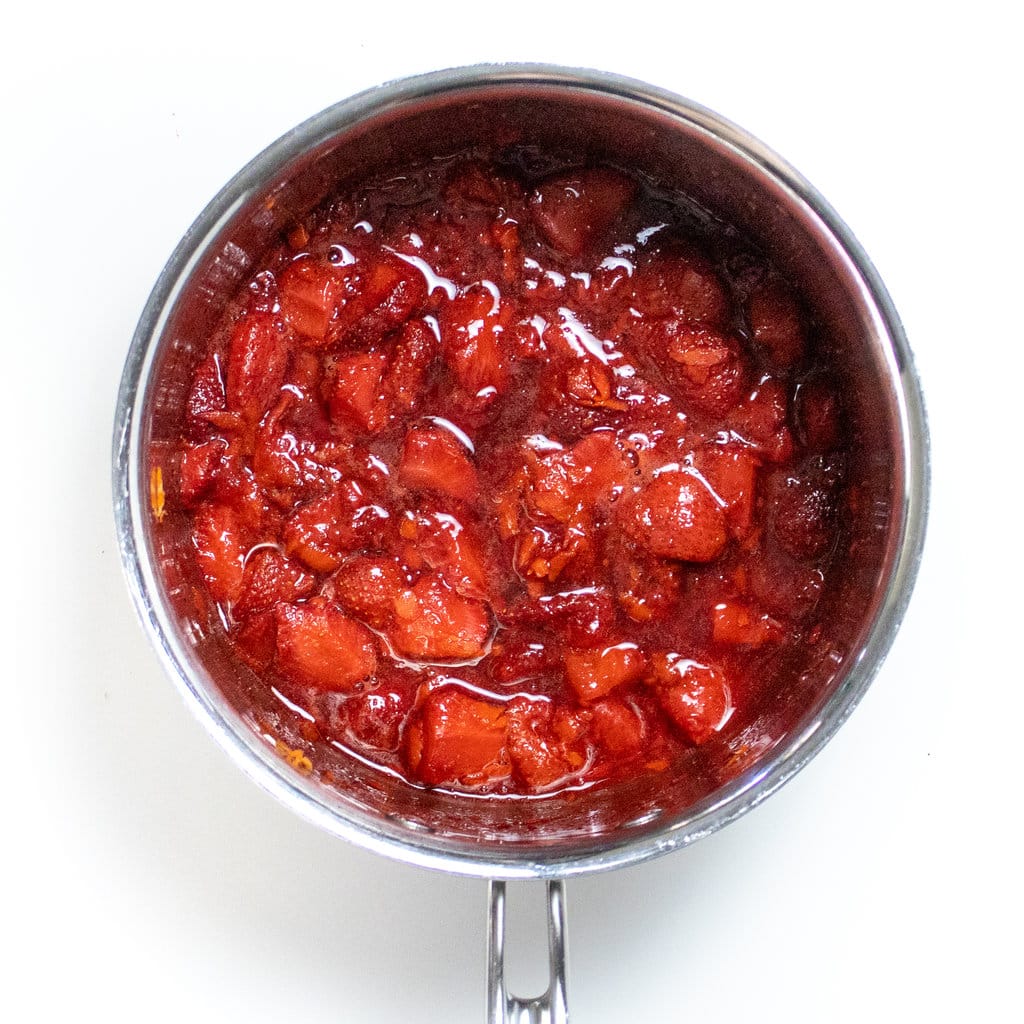
- Add all ingredients into a small saucepan and simmer until tender (roughly 10 minutes).
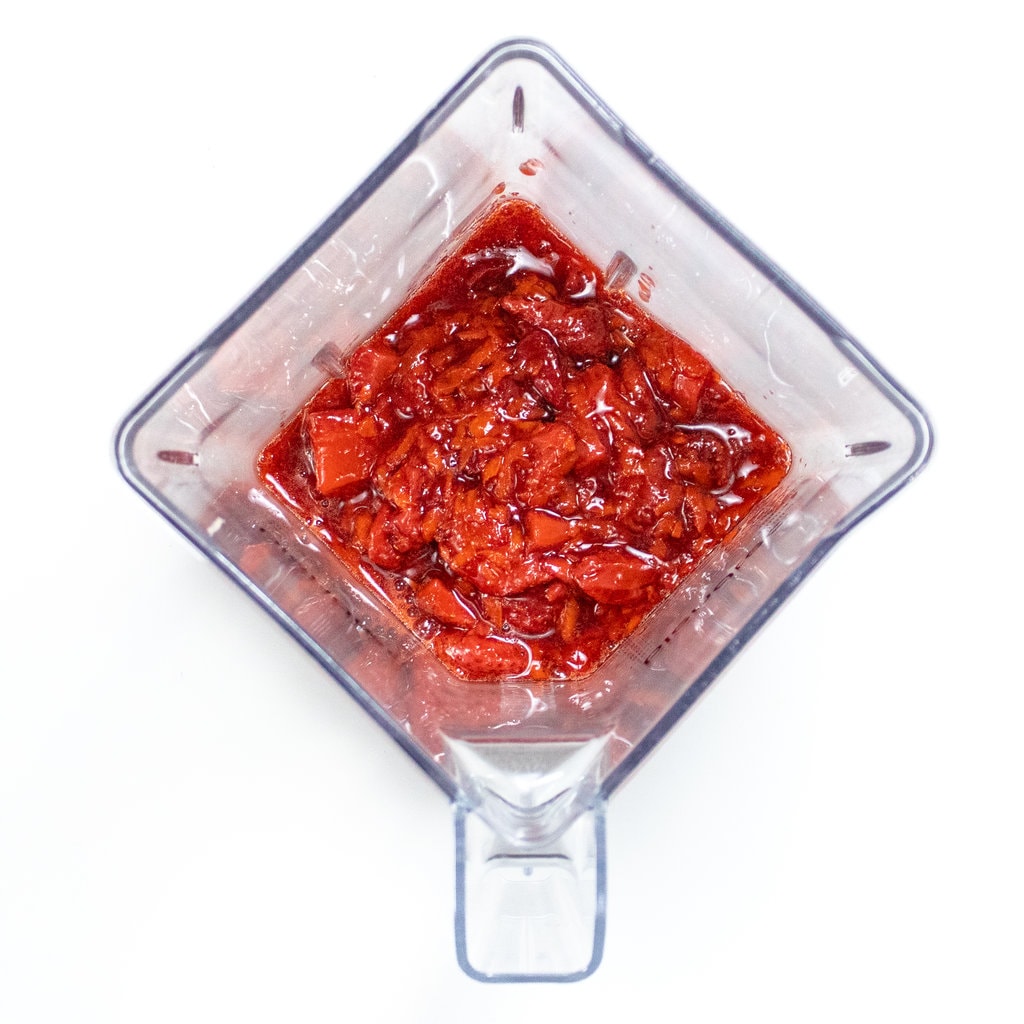
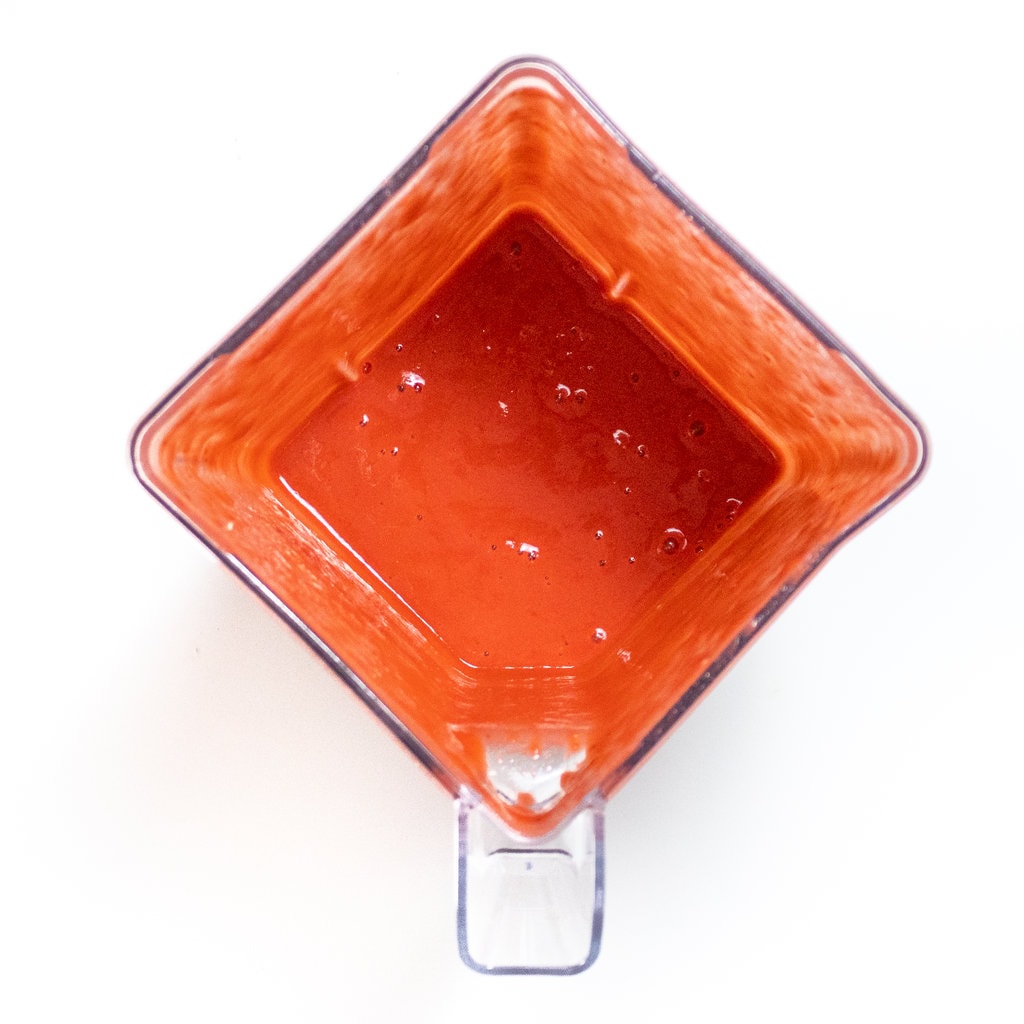
- Transfer the sauce to a blender, and blend for 1-2 minutes or until completely smooth.
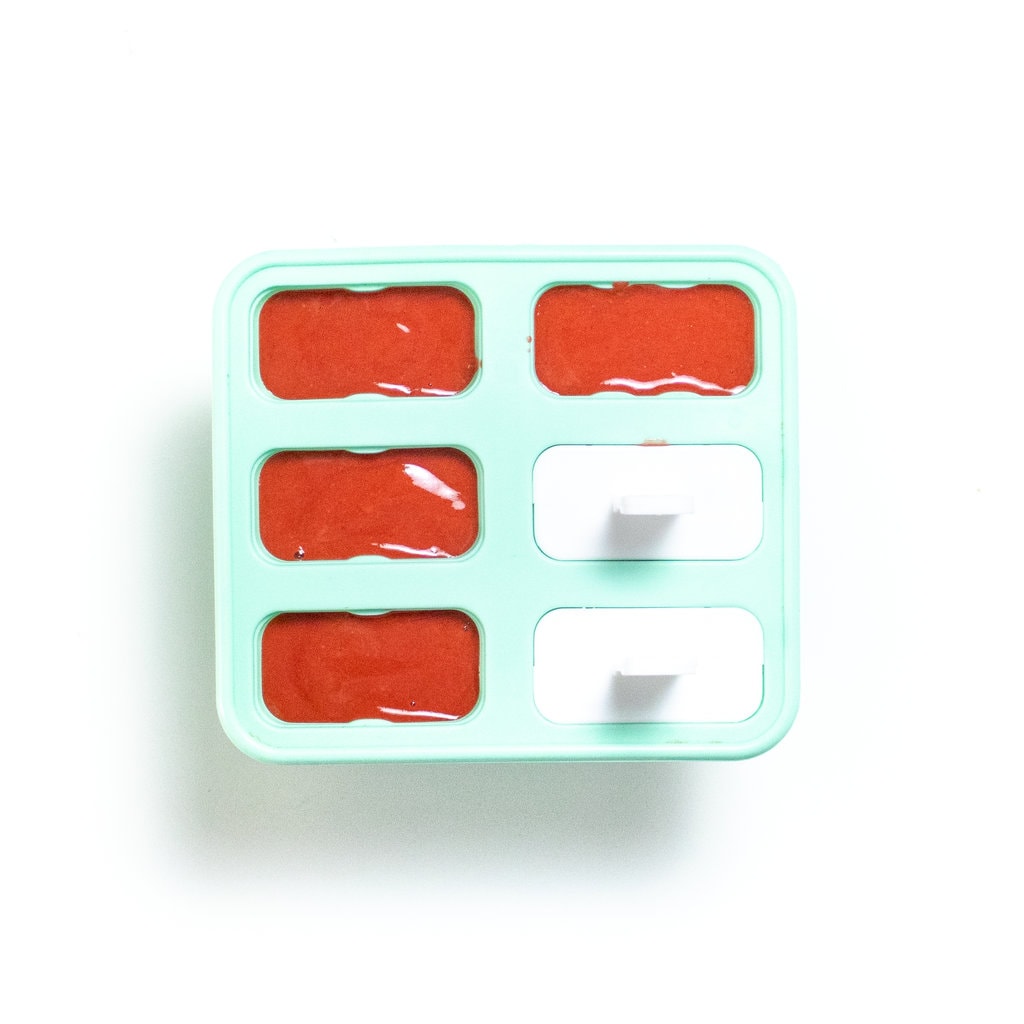
- Pour the strawberry mixture into the popsicle tray, and add the popsicle sticks.
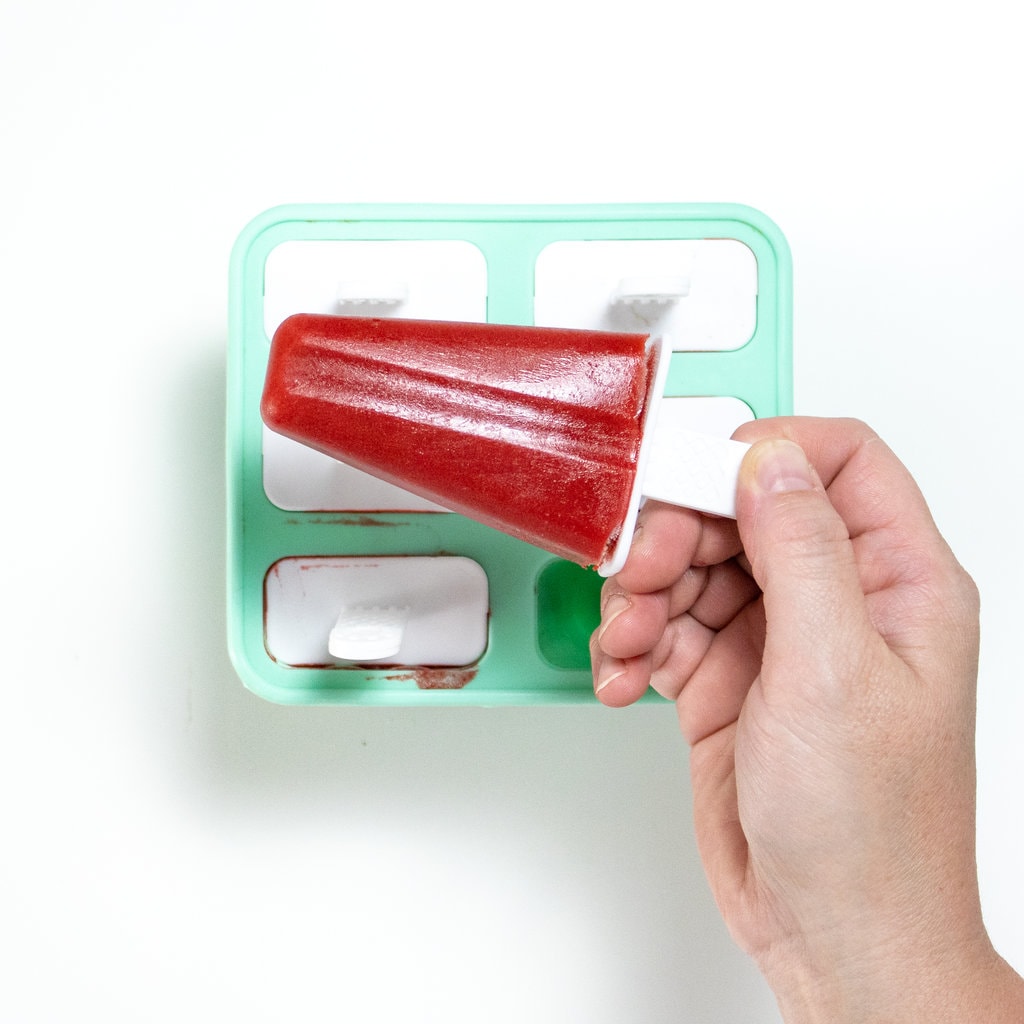
- Freeze for at least 5 hours. Pop out of the mold, serve, and enjoy!
Best Popsicle Molds
I absolutely love a fun and colorful popsicle mold! If you’re looking for the best style to fit your family’s needs, check out my guide to 6 of the best kid-friendly popsicle molds. There are options for every age – babies, toddlers, and big kids (including adults).

Get the recipe: Irresistible 4-Ingredient Strawberry Popsicles (with a hidden veggie!)
Ingredients
- 3 cups fresh or thawed from frozen strawberries (with juices), hulled
- 3 tbsp honey, (see notes)
- 2 tsp fresh lemon juice
- 1/4 cup carrots, shredded or finely chopped
- 1/2 cup water
Instructions
- In a small saucepan, place all ingredients.
- Heat over medium-low heat for 10 minutes, or until strawberries are tender. Let cool slightly.
- Transfer all ingredients into a blender.
- Blend for 1-2 minutes or until strawberries are completely smooth.
- Pour into a popsicle mold to the fill in. Add in the sticks.
- Place in the freezer and freeze for at least 5 hours, but preferably overnight. Remove from popsicle mold, serve and enjoy
Notes
- chopped strawberries
- swirl of yogurt
- crushed graham crackers
- slices or chopped pieces of banana
- 1/2 medium cooked beet
- mango slices
Toddlers
- Toddlers can help measure and pour the ingredients into the blender.
- They can help put the lid on the blender and push start. Note: make sure to talk about not touching the blender blade while making something in the blender, as it can be sharp.
- Once blended, toddlers can help pour the popsicle mixture into the popsicle molds. You may want to pour the popsicle mixture into a smaller measuring cup with pour lip to make it easier on them.
- With help, they can place the popsicle molds into the freezer. My kids always spill the tray at this point, so just give them an extra hand.
Kids
- You can pretty much let older kids make this recipe by themselves.
- They can pick out and measure all of the ingredients. Note: make sure to talk about not touching the blender blade while making something in the blender, as it can be sharp.
- Kids can pour the popsicle mixture into the molds and place the popsicles into the freezer.
Did you make this recipe?
Tag @babyfoode on Instagram and hashtag it #babyfoode!
Medically reviewed and cowritten by Jamie Johnson, Registered Dietitian Nutritionist (RDN), and Lauren Braaten, Pediatric Occupational Therapist (OT).

2 Comments on “Irresistible 4-Ingredient Strawberry Popsicles (with a hidden veggie)”
wow!! It is perfect!!
Hi Maria! Happy to hear that these popsicles turned out great for you. We make them all summer long! xo, Michele