Kid-Requested Sugar Cookies Perfect for Decorating

These sugar cookies are perfect for decorating with your toddler and kids this holiday season! This recipe is simple and delicious, and it’s super versatile — you can sub in different flours and more to make it suit your preferences, whether that’s gluten-free, egg-free, dairy-free, or artificial dye-free.

Sugar Cookies for Toddler + Kids
These easy-peasy sugar cookies need to be made (and eaten;) this weekend! So grab your little one, a glass of wine or a mug of coffee (depending on the time of day😉) and let’s make these delicious and healthy cookies together.
I could go on forever and ever about why I love these cookies.. because guys.. these cookies are literally the best little gems of holiday magic in bite-size form!
First and foremost – they can be made with regular ingredients like all-purpose or white wheat pastry flour, butter, and regular milk. Or they can be made to pretty much-fit anyone’s allergy preferences – gluten-free, dairy-free, egg-free, and/or artificial dye-free! I’m serious – the cookies in these pictures are completely allergy-friendly 😍.
The best thing is that either way, you make these cookies; they taste absolutely amazing!
Plus.. I’ve been looking for years and have finally found these small cookie cutters that are the perfect size for toddlers and kids. They are 2-inch cutters and are great for little hands and also for 2-bite cookies for grown-ups.
TIP: for more healthy and fun recipes for your toddlers and kids, then check out my best-selling cookbook Little Foodie: Recipes for Babies and Toddlers with Taste.

Ingredients
- Flour: I made these using this one-for-one gluten-free blend, but you can also use all-purpose flour or white whole wheat pastry flour in this recipe as well.
- Butter: you can use regular butter or a plant-based butter such as Earth Balance or Miyoko’s.
- Sugar
- Powdered Sugar: you can use regular powdered sugar for the icing or you can use this Monkfruit Powdered Sugar or this Swerve Powdered Sugar.
- Milk: you can use either regular milk or any plain plant-based milk. I used plain almond milk.
- Sprinkles: we love using Supernatural Sprinkles, which are dye-free. I also smashed some dye-free candy canes for sprinkles for this recipe. But any sprinkles you prefer will work.
- Artificial-Free Food Dye: I used Watkins Natural Food Dye for this recipe. Using natural food dye will not change the taste of the reicpe, but the colors will not be as bold as a regular food dye, but they will still be pretty and festive. Again, this is just what I use but you use what you prefer.

Tools Needed
- Mixing Bowl or Stand Mixer
- Measuring Cups and Spoons
- Baking Sheets
- Wire Rack
- Mini Christmas Cookie Cutters
- Plant-Based Food Dye
- Plant-Based Sprinkles and Candy Canes
Let’s Get Baking


Make Ahead Tips
You can make these sugar cookies a few hours or a few days ahead of time. Simply make the dough and tightly wrap it in plastic wrap. Remove the dough 30 minutes – 1 hour before you want to start rolling the cookies out.
If you want to make the dough a week or more before you plan on baking them (good for you for planning that far in advance), you can freeze the tightly wrapped dough in the freezer for up to 3 months.

Storage
You can store the baked and decorated cookies in an air-tight container on the counter for up to 5 days. You can also freeze decorated cookies for up to 3 months, store them in a freezer zip-lock or stasher bag.
Cooking with Kids Tips
These are the perfect cookie to make with your toddlers and kids! Depending on how old your kiddos are and how much energy you have, you can let them help with the entire recipe or you can do the first steps for them and have them jump in on the decorating part.
- Toddlers seem to have the most fun decorating the cookies, so you can easily set them up with a station of cooked cookies, icing and sprinkles and let them have at it.
- For little ones, you can put the icing in a bowl and have them use a paint brush to brush on the icing.
- Having a well floured surface helps toddlers and kids have an easier time cutting out the shapes and transferring them to the baking sheet.
- If your kiddos want to do the entire cooking project but you want to break it up – you can easily make the dough and then put it in the fridge until you are ready for the cooking and decoration portion. Just be sure to take out the dough and let it come to room temperature before rolling it out.
- You can totally skip the icing – all you have to do is cut out the cookies, place them on a baking sheet and then add a few sprinkles on top (gently press them down so they stick) before baking for 8-10 minutes.

Get the recipe: Kid-Requested Sugar Cookies Perfect for Decorating
Ingredients
Sugar Cookies
- 1/2 cup butter or dairy-free butter, room temperature
- 1/2 cup sugar
- 1 tsp vanilla extract
- 1 1/2 cups flour – gluten-free, all-purpose or white whole wheat pastry flour
- 1/2 tsp baking soda
- 1/4 tsp salt
- 2-3 tbsp milk – regular or plain plant based milk
Icing
- 2 cups powdered sugar
- 1/2 tsp vanilla extract
- 1-3 tbsp milk – regular or plain plant based milk
- sprinkles
- artifical-free food dye
Instructions
- Prep: Preheat the oven to 350°. Line a baking sheet with parchment paper or a silicone mat.
- Whisk: In a small bowl, whisk together the flour, baking soda and salt; set aside.
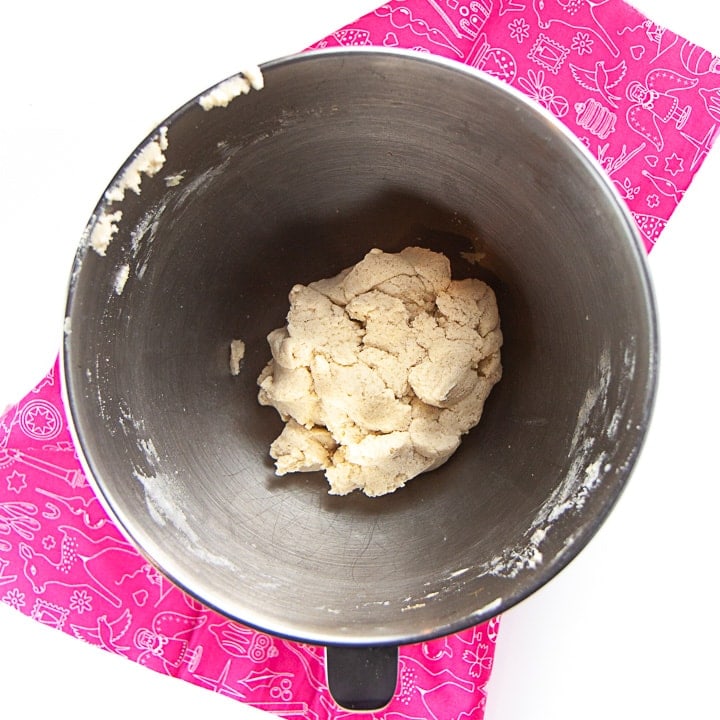
- Beat: In a large mixing bowl either with a stand mixer or a hand mixer, beat together the butter and sugar on medium speed for 2 minutes or until light and fluffy. Add in the vanilla and beat for another 30 seconds, scraping down sides if needed.
- Add Dry Ingredients: Add in half of the flour mixture and beat on low speed until combined. Add in the other half of the flour mixture and beat until just combined. Add in a tablespoon of milk at a time, beating on low speed until the ingredients form a dough ball.
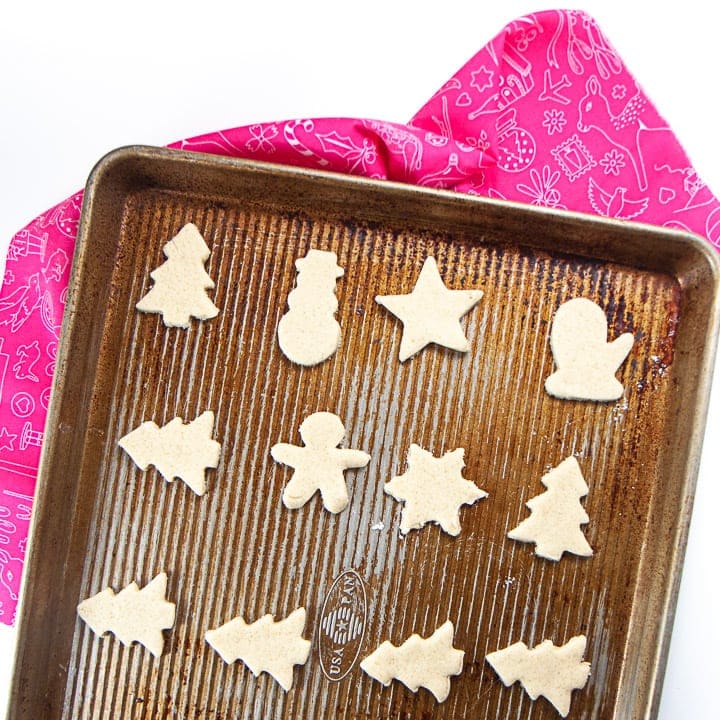
- Roll Out: Dust a clean counter or cutting board with a little flour and place half of the dough in a ball on top of the flour. Sprinkle a little flour on top of the dough ball and with a rolling pin, roll out the dough until it is 1/3" thick. Cut out desired shapes using cookie cutters. Transfer the shapes to a baking sheet. Gather up the scraps of dough and re-roll it before cutting out more shapes. If the dough is hard to work with, add more flour to the counter and the top of the dough or place the dough ball in the fridge for 5-10 minutes.
- Bake: Bake cookies for 8-10 minutes or until they are just turning golden brown on the sides.
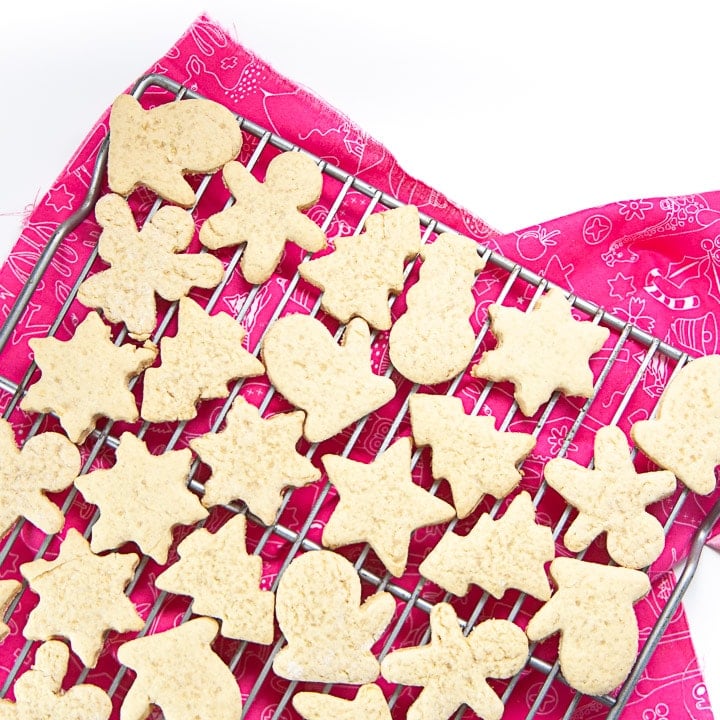
- Let Cool: Let them rest on the cookie sheet for 2-4 minutes and then transfer them to a cooling rack to finish cooling.
- Icing: To make the icing – place the powdered sugar, vanilla and 1 tablespoon of milk in a medium bowl and whisk together until the sugar has melted and the icing is smooth. If needed, add in another tablespoon of milk until you have your desired consistency. The firmer the icing, the more will be on the cookies. If you want a thinner icing (less sugar for kids), add a little more milk.
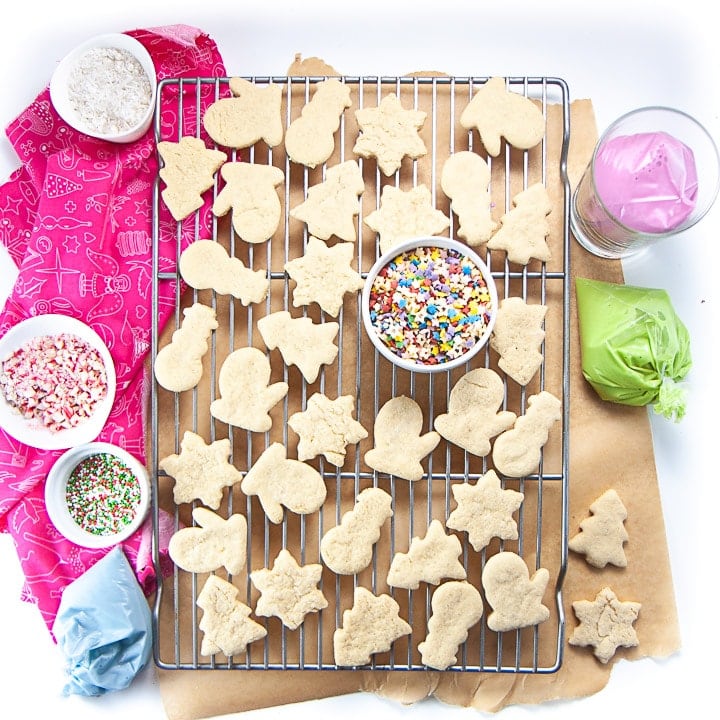
- Add Color: Separate the icing into different bowls for however many colors of icing you want. I did 4 different colors. Add in a couple of drops of artificial-free food dye and mix until incorporated, adding more drops if needed.
- Decorate: I placed the icing into a zip-lock baggie to decorate the cookies, but you can also spread it on with a knife or paint it on with a paintbrush. Add some sprinkles and then let the icing on the cookies harden on cooling rack.
Notes
Did you make this recipe?
Tag @babyfoode on Instagram and hashtag it #babyfoode!
Frequently Asked Questions
Yes! You can easily replace the flour with any one-for-one gluten-free flour of your choice.
Yes! You can use a plant-based butter such as Earth Balance or Miyoko’s. You can also use any plant-based milk you prefer, such as oat, almond, soy, etc.
Yes! The cookies in these photos are made with dye-free food coloring and sprinkles.
Absolutely! To freeze the sugar cookie dough, you will need to wrap the cookie dough tightly in plastic wrap, then place in dough in the freezer. To thaw, you will want to place the cookie dough in the fridge and let thaw overnight. Then roll out, cut shapes and bake according to the recipes instructions.
Your dough may be too warm. An easy fix is to add a bit more flour little by little until the dough is not sticky. You can also place the dough in the fridge until just chilled – roughly 10 minutes. You can also use 2 pieces of parchment paper that is lightly dusted with flour to roll out the dough.

22 Comments on “Kid-Requested Sugar Cookies Perfect for Decorating”
Love the recipe but I used almond flour and it was too sticky. Couldn’t roll it out. How do I fix that?
Hi Genevieve! I’ve made these cookies in the past using one-for-one gluten-free blend, all-purpose flour and white whole wheat pastry flour with no issues. I haven’t used almond flour in this recipe. However i do address sticky dough under the Frequently Asked Questions so check that out. xo, Michele
Can I substitute agave in 1:1 ratio for the sugar?
Hi Brittany! I’m not sure because I haven’t tried it myself. You would need to make some changes since agave is liquid and sweeter than organic sugar. If you try it let me know how it works out. xo, Michele
These were so easy and fun to make with my four-year-old. They didn’t create too many dishes. And they came out tasty! Thank you!
Hi Brittany! I’m all in for less dishes to do! =P Happy holidays! xo, Michele
I made these today with 7 children from ages 5-11. They were easy to make and they helped every step of the way. They frosted them and added sprinkles. They had a great time!
That’s awesome! Glad everyone got to help out!
I’ve never baked dairy free before. These turned out great! Just like regular sugar cookies. I used a 3″ heart cutter amd got 15 cookies, baked at 8 min, came out perfect. Thanks!
These cookies turned out perfectly and are delicious!
It is not easy trying to find a recipe that is gluten free and egg free that holds together and tastes great, but this one we will make over and over again!
So happy to hear these cookies were a hit! Thank you for your comments and review!
Just made these for the second time. First time they were perfect, other than having to leave in oven an extra 2 mins. This time dough was way to dry so i added more milk. They did have to cook about 13 minutes though. I am at a higher altitude not sure if thats the reason. Otherwise great cookie for my boys with egg allergies.
Glad these cookies worked out for you! The humidity at a higher altitude may have affected the dryness of the batter. Glad you got them to work, though!
Can I make the dough a few days in advance and store it in the fridge?
Yes! You can make the dough ahead of time. You will need to take it out of the fridge for 30-45 minutes before you want to roll it out for the dough to be warm enough to handle.
Can I use confectioners sugar instead of regular sugar
I haven’t tried using confectioners sugar in the cookie base, but you can give it a try if you want.
Can I use coconut sugar in place or the cane sugar?
Yes! The color of the cookies will be a little darker, but I have used it and they tasted to use, just as good.
Wow, these sugar cookies look great and my kids will love them! I will try to make this on Christmas. Thanks a lot for sharing this.
Can the icing be made the day before? How do you recommend storing to maintain consistency?
Yes! I would store in the fridge and then take it out a few hours before you need it to bring it to room temperature.