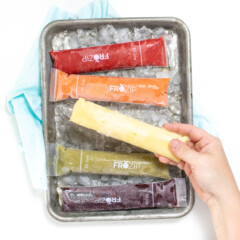
Get the recipe: Homemade Fresh Fruit Ice Pops (Otter Pops)
Summer is here, which means pool days, family adventures, and plenty of icy treats! With reusable ice pop sleeves and just 3 simple ingredients, you can whip up these healthy homemade ice pops to keep your kids cool, hydrated, and smiling all season long.
Ingredients
Strawberry Watermelon Ice Pops
- 1 cup strawberries (see more options below)
- 2 cups watermelon (see more options below)
- 4 tbsp honey or other sweetener (see more options below)
- 1/2 cup coconut water or other liquid (see more options below)
Instructions
- Place all ingredients into a blender.
- Blend for 1-2 minutes, or until all of the ingredients are completely smooth.
- Using a funnel, pour the fruit mixture into the ice pop sleeves.
- Lay flat on a baking sheet and place in the freezer for at least 5 hours, but preferably overnight.
- Remove from the freezer, open the ice pop sleeve, and serve.
Notes
Fruit Ideas
- strawberries
- watermelon
- cantaloupe
- pineapple
- grapes
- kiwi
- peaches
- nectarines
- blueberries
- raspberries
Sweetener Ideas
- maple syrup
- honey (for babies over 1)
- agave nectar
- simple syrup
- sugar
Liquid Ideas
- apple juice
- grape juice
- orange juice
- coconut water
- yogurt - plain whole milk
- flavored yogurt
- plant-based yogurt
- kefir - plain or flavored
- canned coconut milk
- water
Toddlers
- Toddlers can help measure and pour the ingredients into the blender.
- They can help put the lid on the blender and push start. Note: make sure to talk about not touching the blender blade while making something in the blender, as it can be sharp.
- Once blended, toddlers can help pour the popsicle mixture into the popsicle molds. You may want to pour the popsicle mixture into a smaller measuring cup with pour lip to make it easier on them.
- Toddlers can help load the freezer tubes into the freezer.
Kids
- You can pretty much let older kids make this recipe by themselves.
- They can pick out and measure all of the ingredients. Note: make sure to talk about not touching the blender blade while making something in the blender, as it can be sharp.
- Kids can pour the popsicle mixture into the freezer tubes and place the ice pops into the freezer.
- Using yogurt will give you a creamier base, while using fruit juice or water will make for more of an “ice-pop” popsicle.
- Use a high-powered blender and puree until super smooth, for the best texture.
- If the ice pop is too cold for your little one to hold onto, you can wrap the bottom in a small towel or paper towel for them to get a grip on.
Did you make this recipe?
Tag @babyfoode on Instagram and hashtag it #babyfoode!